视频教程
图文教程
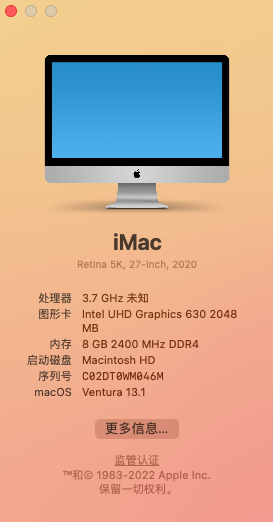
解决这个问题有两种方式,但是两种解决方式的效果也是不一样的
方式一:修改ProcessorType
1.查询自己CPU对于的值,指定CPU 代码查询
// <0201> 01 cores Intel Core Solo Intel Core Solo
// <0201> 02 cores Intel Core Duo Intel Core Duo
// <0301> 01 cores Intel Core 2 Solo Intel Core 2 Solo
// <0301> 02 cores Intel Core 2 Duo Intel Core 2 Duo
// <0401> 01 cores Single-Core Intel Xeon Single-Core Intel Xeon
// <0401> 02 cores Dual-Core Intel Xeon Dual-Core Intel Xeon
// <0402> 01 cores Single-Core Intel Xeon Single-Core Intel Xeon
// <0402> 02 cores Dual-Core Intel Xeon Dual-Core Intel Xeon
// <0402> 03 cores Unknown Intel Xeon Unknown Intel Xeon
// <0402> 04 cores Quad-Core Intel Xeon Quad-Core Intel Xeon
// <0501> 01 cores Single-Core Intel Xeon Single-Core Intel Xeon
// <0501> 02 cores Dual-Core Intel Xeon Dual-Core Intel Xeon
// <0501> 03 cores Unknown Intel Xeon Unknown Intel Xeon
// <0501> 04 cores Quad-Core Intel Xeon Quad-Core Intel Xeon
// <0501> 06 cores 6-Core Intel Xeon 6-Core Intel Xeon
// <0601> 01 cores Intel Core i5 Intel Core i5
// <0601> 02 cores Intel Core i5 Intel Core i5
// <0601> 03 cores Intel Core i5 Intel Core i5
// <0601> 04 cores Intel Core i5 Intel Core i5
// <0601> 06 cores Intel Core i5 Intel Core i5
// <0701> 01 cores Intel Core i7 Intel Core i7
// <0701> 02 cores Intel Core i7 Intel Core i7
// <0701> 03 cores Intel Core i7 Intel Core i7
// <0701> 04 cores Intel Core i7 Intel Core i7
// <0701> 06 cores Intel Core i7 Intel Core i7
// <0901> 01 cores Intel Core i3 Intel Core i3
// <0901> 02 cores Intel Core i3 Intel Core i3
// <0901> 03 cores Intel Core i3 Intel Core i3
// <0901> 04 cores Intel Core i3 Intel Core i3
// <0A01> 04 cores Quad-Core Intel Xeon E5 Quad-Core Intel Xeon E5
// <0A01> 06 cores 6-Core Intel Xeon E5 6-Core Intel Xeon E5
// <0A01> 08 cores 8-Core Intel Xeon E5 8-Core Intel Xeon E5
// <0A01> 10 cores 10-Core Intel Xeon E5 10-Core Intel Xeon E5
// <0A01> 12 cores 12-Core Intel Xeon E5 12-Core Intel Xeon E5
// <0B01> 01 cores Intel Core M Intel Core M
// <0B01> 02 cores Intel Core M Intel Core M
// <0B01> 03 cores Intel Core M Intel Core M
// <0B01> 04 cores Intel Core M Intel Core M
// <0C01> 01 cores Intel Core m3 Intel Core m3
// <0C01> 02 cores Intel Core m3 Intel Core m3
// <0C01> 03 cores Intel Core m3 Intel Core m3
// <0C01> 04 cores Intel Core m3 Intel Core m3
// <0D01> 01 cores Intel Core m5 Intel Core m5
// <0D01> 02 cores Intel Core m5 Intel Core m5
// <0D01> 03 cores Intel Core m5 Intel Core m5
// <0D01> 04 cores Intel Core m5 Intel Core m5
// <0E01> 01 cores Intel Core m7 Intel Core m7
// <0E01> 02 cores Intel Core m7 Intel Core m7
// <0E01> 03 cores Intel Core m7 Intel Core m7
// <0E01> 04 cores Intel Core m7 Intel Core m7
// <0F01> 08 cores Intel Xeon W Intel Xeon W
// <0F01> 10 cores Intel Xeon W Intel Xeon W
// <0F01> 12 cores Intel Xeon W Intel Xeon W (10.15+)
// <0F01> 14 cores Intel Xeon W Intel Xeon W
// <0F01> 16 cores Intel Xeon W Intel Xeon W (10.15+)
// <0F01> 18 cores Intel Xeon W Intel Xeon W
// <0F01> 24 cores Intel Xeon W Intel Xeon W (10.15+)
// <0F01> 28 cores Intel Xeon W Intel Xeon W (10.15+)
// <1001> 06 cores Intel Core i9 Intel Core i9
// <1001> 08 cores Intel Core i9 Intel Core i9 (10.15+)
// <1001> 10 cores Intel Core i9 Intel Core i9 (10.15+)
更多Mac 型号上使用的 CPU 列表:http://imacos.top/2023/01/05/mac-cpu/
2.需要将上面的16进制转化为10进制来填入ProcessorType 对应项,例如我的是i3 10105T的处理器,我这里对应// <0901> 04 cores Intel Core i3 Intel Core i3,则需要吧0901这个16进制数值转换为10进制,即:2305,如果你不知道怎么转换,可以使用Hackintool.app如下图,在16进制输入要转换的值,就得到了10进制的数值.

3.将2305填入ProcessorType 对应项,如下图
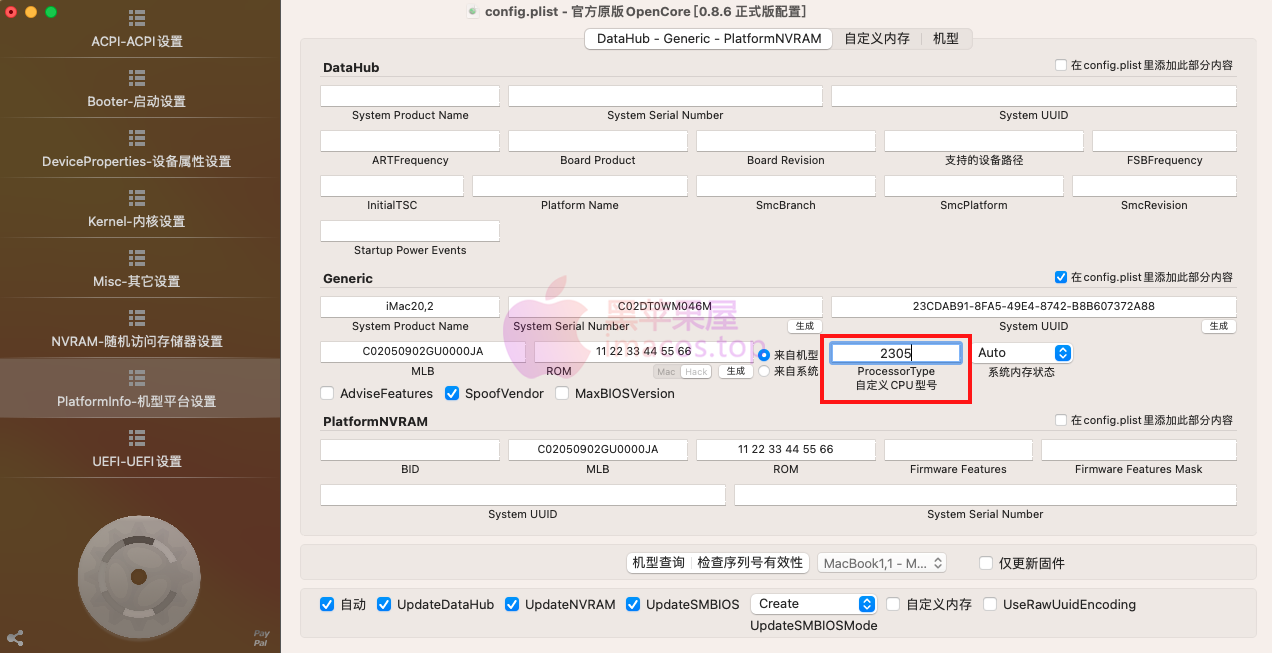
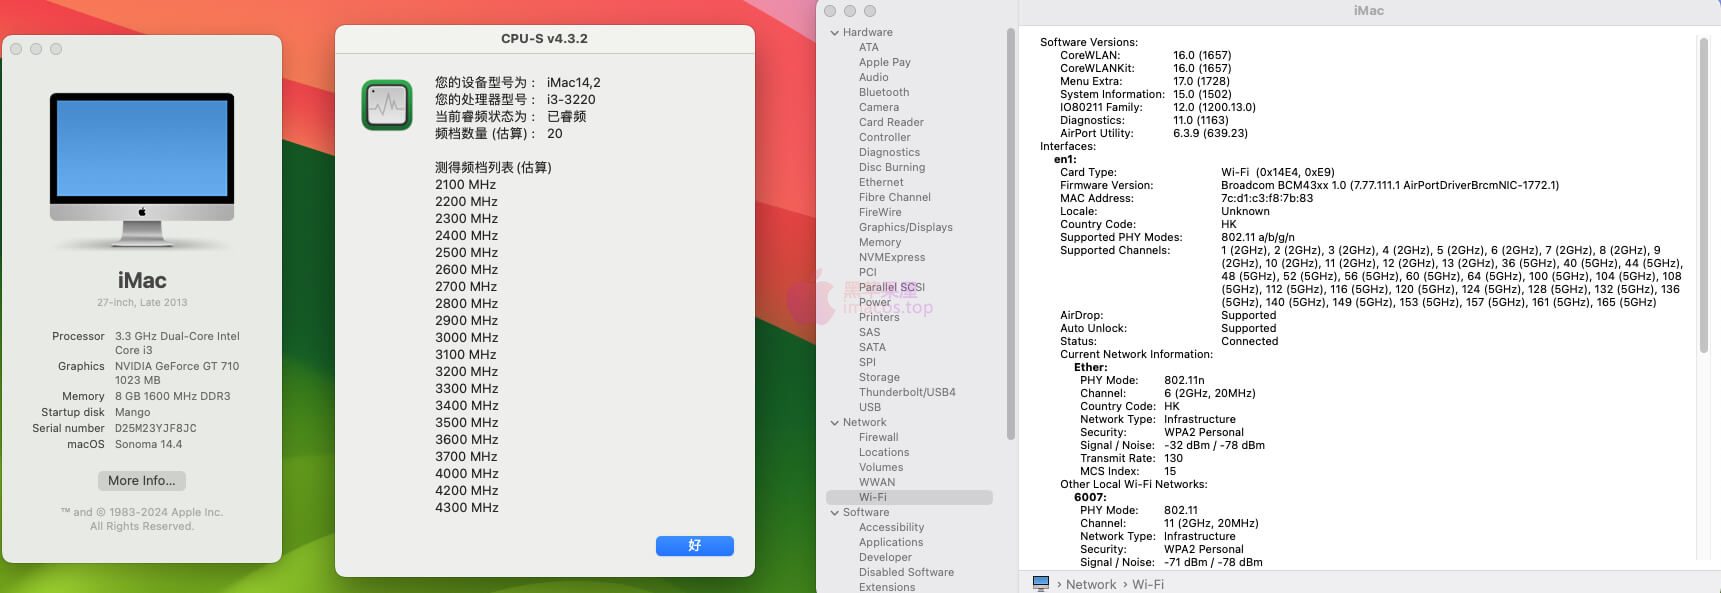
4.最终效果图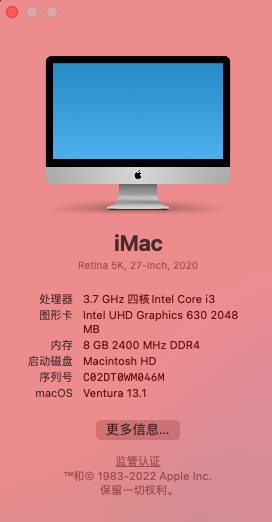
方式二:自定义CPU型号
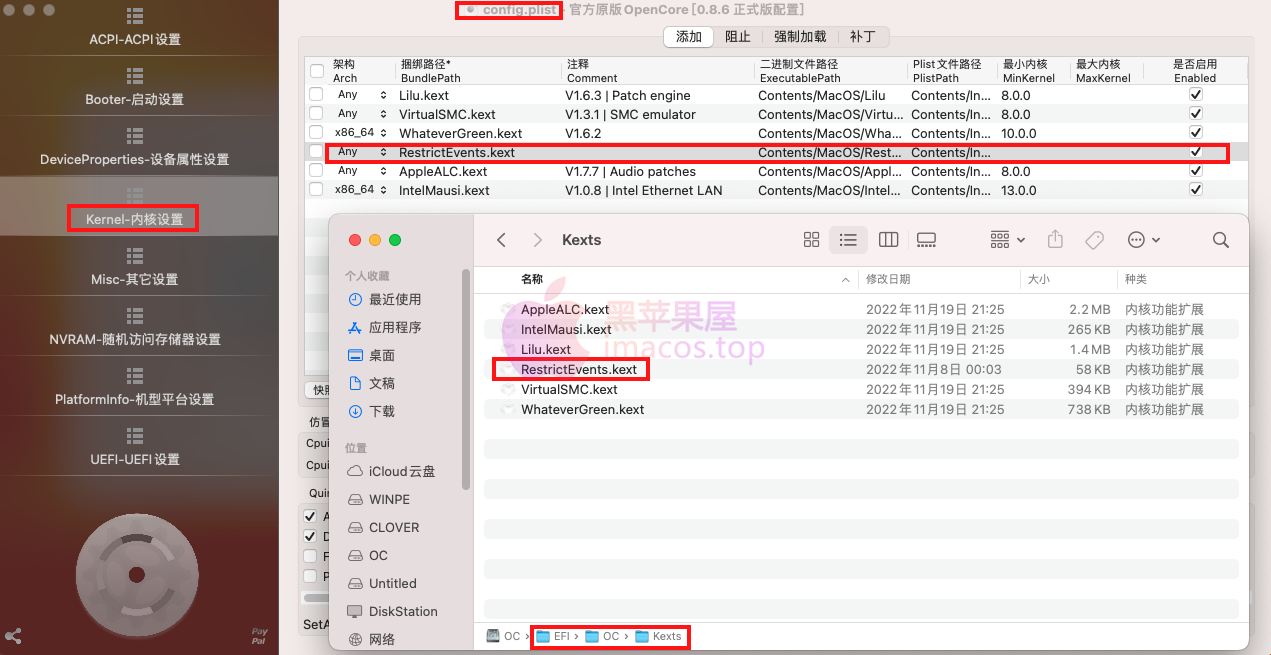
1.添加RestrictEvents.kext驱动到/EFI/OC/Kexts目录下,并在config.plist中启用,如下图
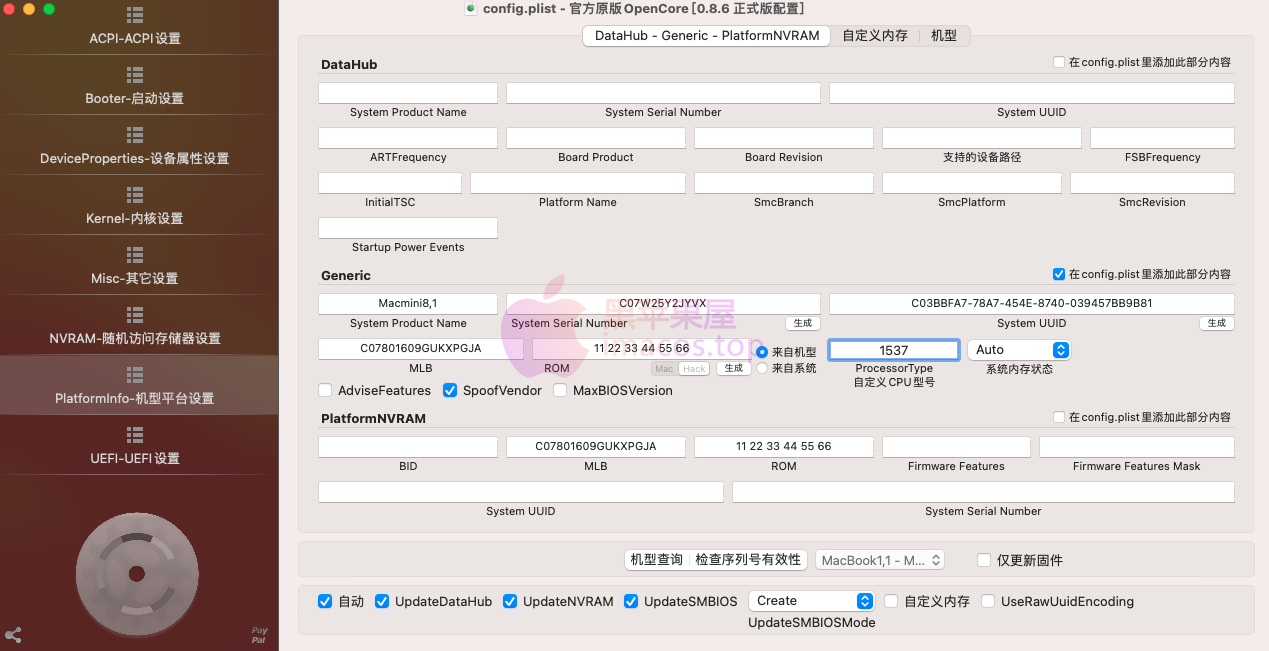
2.对于 8 核或更高版本的 CPU,Apple CPU 标识符必须为 0x0F01;对于 1、2、4 或 6 核,Apple CPU 标识符必须为 0x0601。这是 OpenCore 中非原生支持的 CPU 的默认设置。0x0F01及0x0601可以参考方式一的第2步,将16进制转换成10进制,以我的i3 10105为例,应该选择0x0601,转换成10进制为1537,将1537填入ProcessorType 对应项,如下图
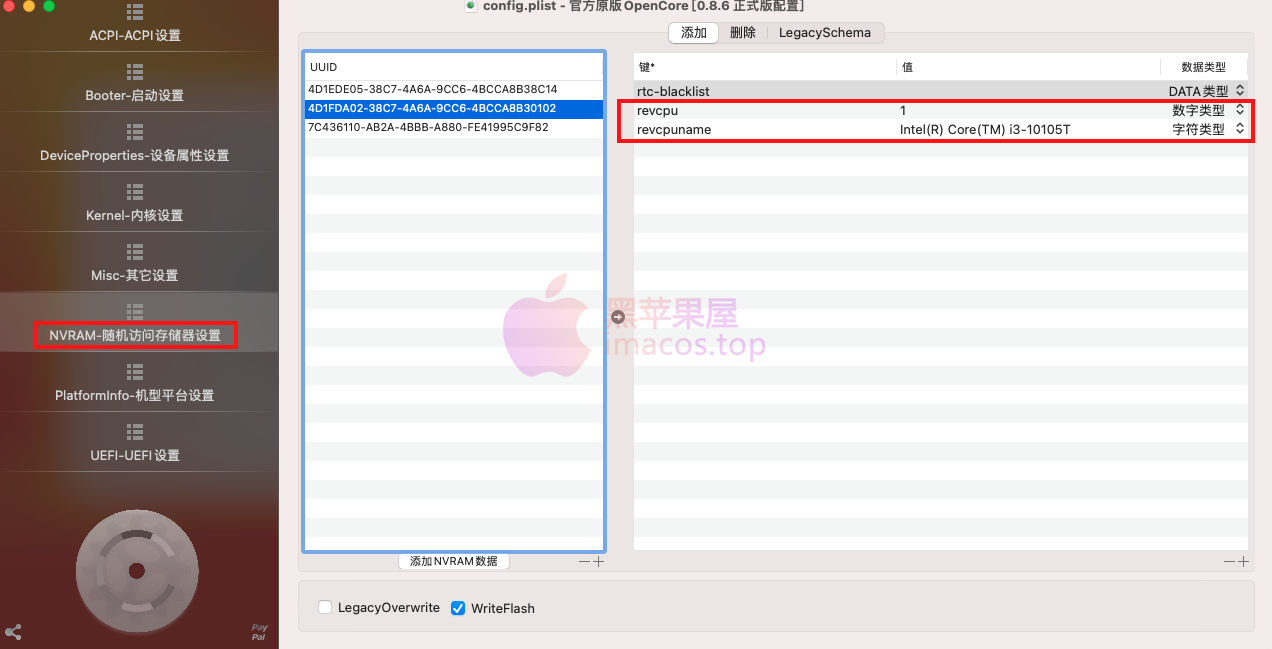
3.NVRAM -> 添加 -> 4D1FDA02-38C7-4A6A-9CC6-4BCCA8B30102
revcpuname      String      Intel(R) Core(TM) i3-10105T
revcpu          Number      1
如下图
4.最终效果图
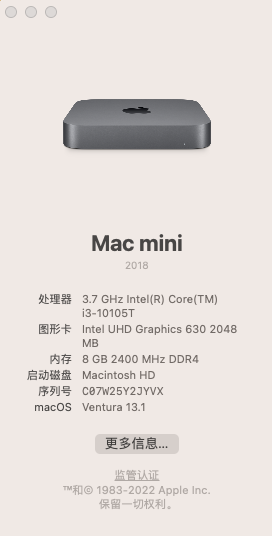
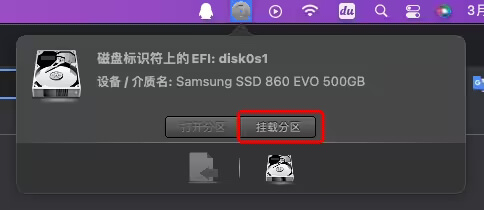
注:操作完成后记得在OpenCore引导界选择Reset NVRAM项重置一下,如方式二操作不成功,尝试在启动参数中添-revbeta revnopatch=all revcpu=1
本教程所需工具下载解压密码imacos.top


评论0