- 规格/参数:
- DW1820A/BCM94350ZAE
- M.2 NGFF 2230
- 802.11ac 双频 支持2.4GHz/5GHz
- 867Mbps
- BlueTooth 4.1
已知支持的设备信息
WLAN:
- Vendor:
0x14E4 - Device:
0x43A3- Sub Vendor:
1028or106B - Sub Device:
002100220023075a
- Sub Vendor:
Bluetooth:
- Vendor ID:
0x0A5C - Product ID:
0x64120x6414
DELL DW1820A设备信息整理
| Part Number | Manufacturer | Module | WLAN | BT 4.1 |
|---|---|---|---|---|
CN-0VW3T3 |
Dell Wireless 1820A 802.11ac | BCM94350ZAE_2 | 1028:0021 |
[0a5c:6412] |
CN-0VW3T3 |
Dell Wireless 1820A 802.11ac | BCM94356ZEPA50DX_2 | 1028:0021 |
[0a5c:6412] |
CN-096JNT |
Dell Wireless 1820A 802.11ac | BCM94356ZEPA50DX_2 | 1028:0022 |
[0a5c:6412] |
CN-08PKF4 |
Dell Wireless 1820A 802.11ac | BCM94356ZEPA50DX_2 | 1028:0023 |
[0a5c:6412] |
联想版BCM94350设备信息整理
| Part Number | Manufacturer | Module | WLAN | BT 4.1 |
|---|---|---|---|---|
00JT493 |
Lenovo | BCM94350ZAE_2 | 1028:075a |
[0a5c:6414] |
00JT494 |
Lenovo | BCM94350ZAE_2 | 1028:075a |
[0a5c:6414] |
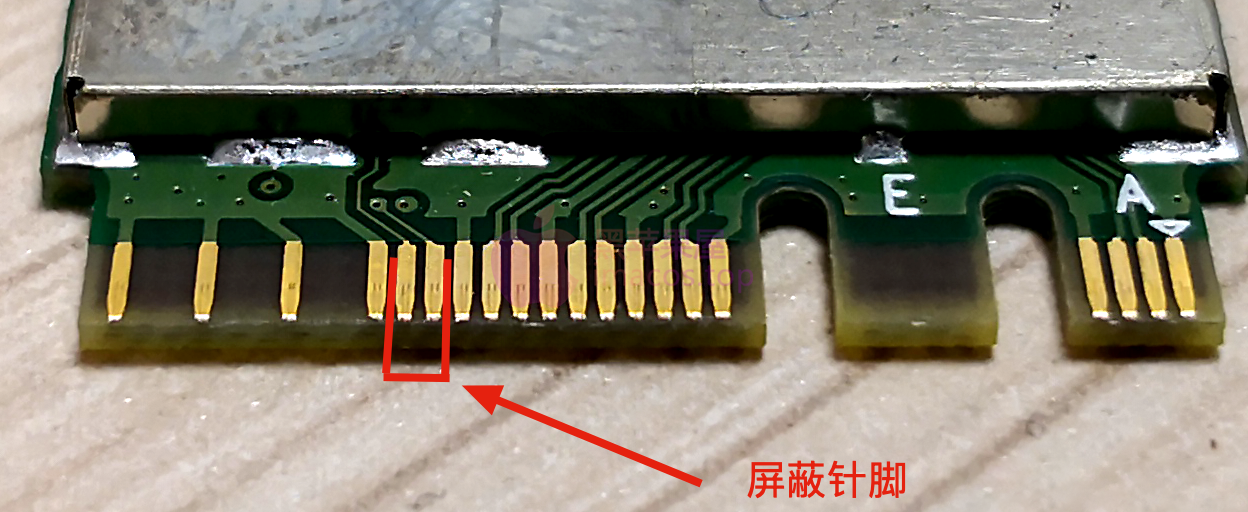
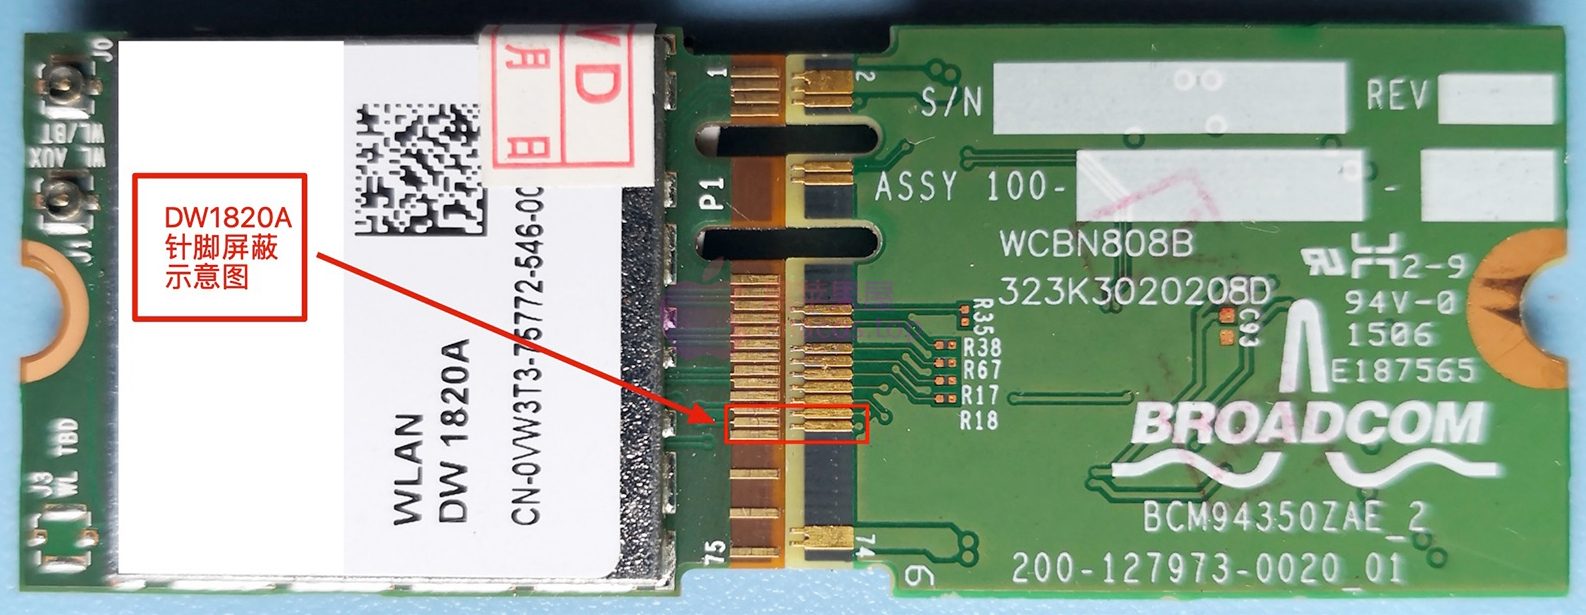
联想及绝大多数机型可能需要屏蔽针脚测试,详见文章末尾
macOS驱动方法
建议采用 Device->Properties 注入参数以便于直接驱动 AirPortBrcm4360 而不是驱动 AirPort.BrcmNIC
在
Big Sur系统中,已经将AirPortBrcm4360驱动移除,只保留了AirPort.BrcmNIC,现在可驱动的设备是:
- Pci14e4,43ba
- Pci14e4,43a3
- Pci14e4,43a0
WLAN无线网卡
如果开机直接就驱动了WIFI无线网卡并且能持续、稳定地工作,那么下面这段内容就可以直接跳过,转到驱动蓝牙部分。
方法1【CLOVER小白篇】
- 使用工具:
Clover Configurator,打开配置文件config.plist 跳转到Devices->Properties:在左侧Devices中添加网卡所在的设备地址:PciRoot(0x0)/Pci(0x1c,0x0)/Pci(0x0)在右侧分别添加:
Properties Key*Properties ValueValue TypeAAPL,slot-nameWLANSTRINGcompatiblepci14e4,43a3STRINGdevice_typeAirport ExtremeSTRINGmodelDW1820A (BCM4350) 802.11ac WirelessSTRINGnameAirportSTRING
完成后的截图如下:

至于这个PciRoot(0x0)/Pci(0x1c,0x0)/Pci(0x0)是如何获得的,我们需要搬出工具Hackintool 在PCI信息里,点击网卡所在行,右键->Copy Device Path
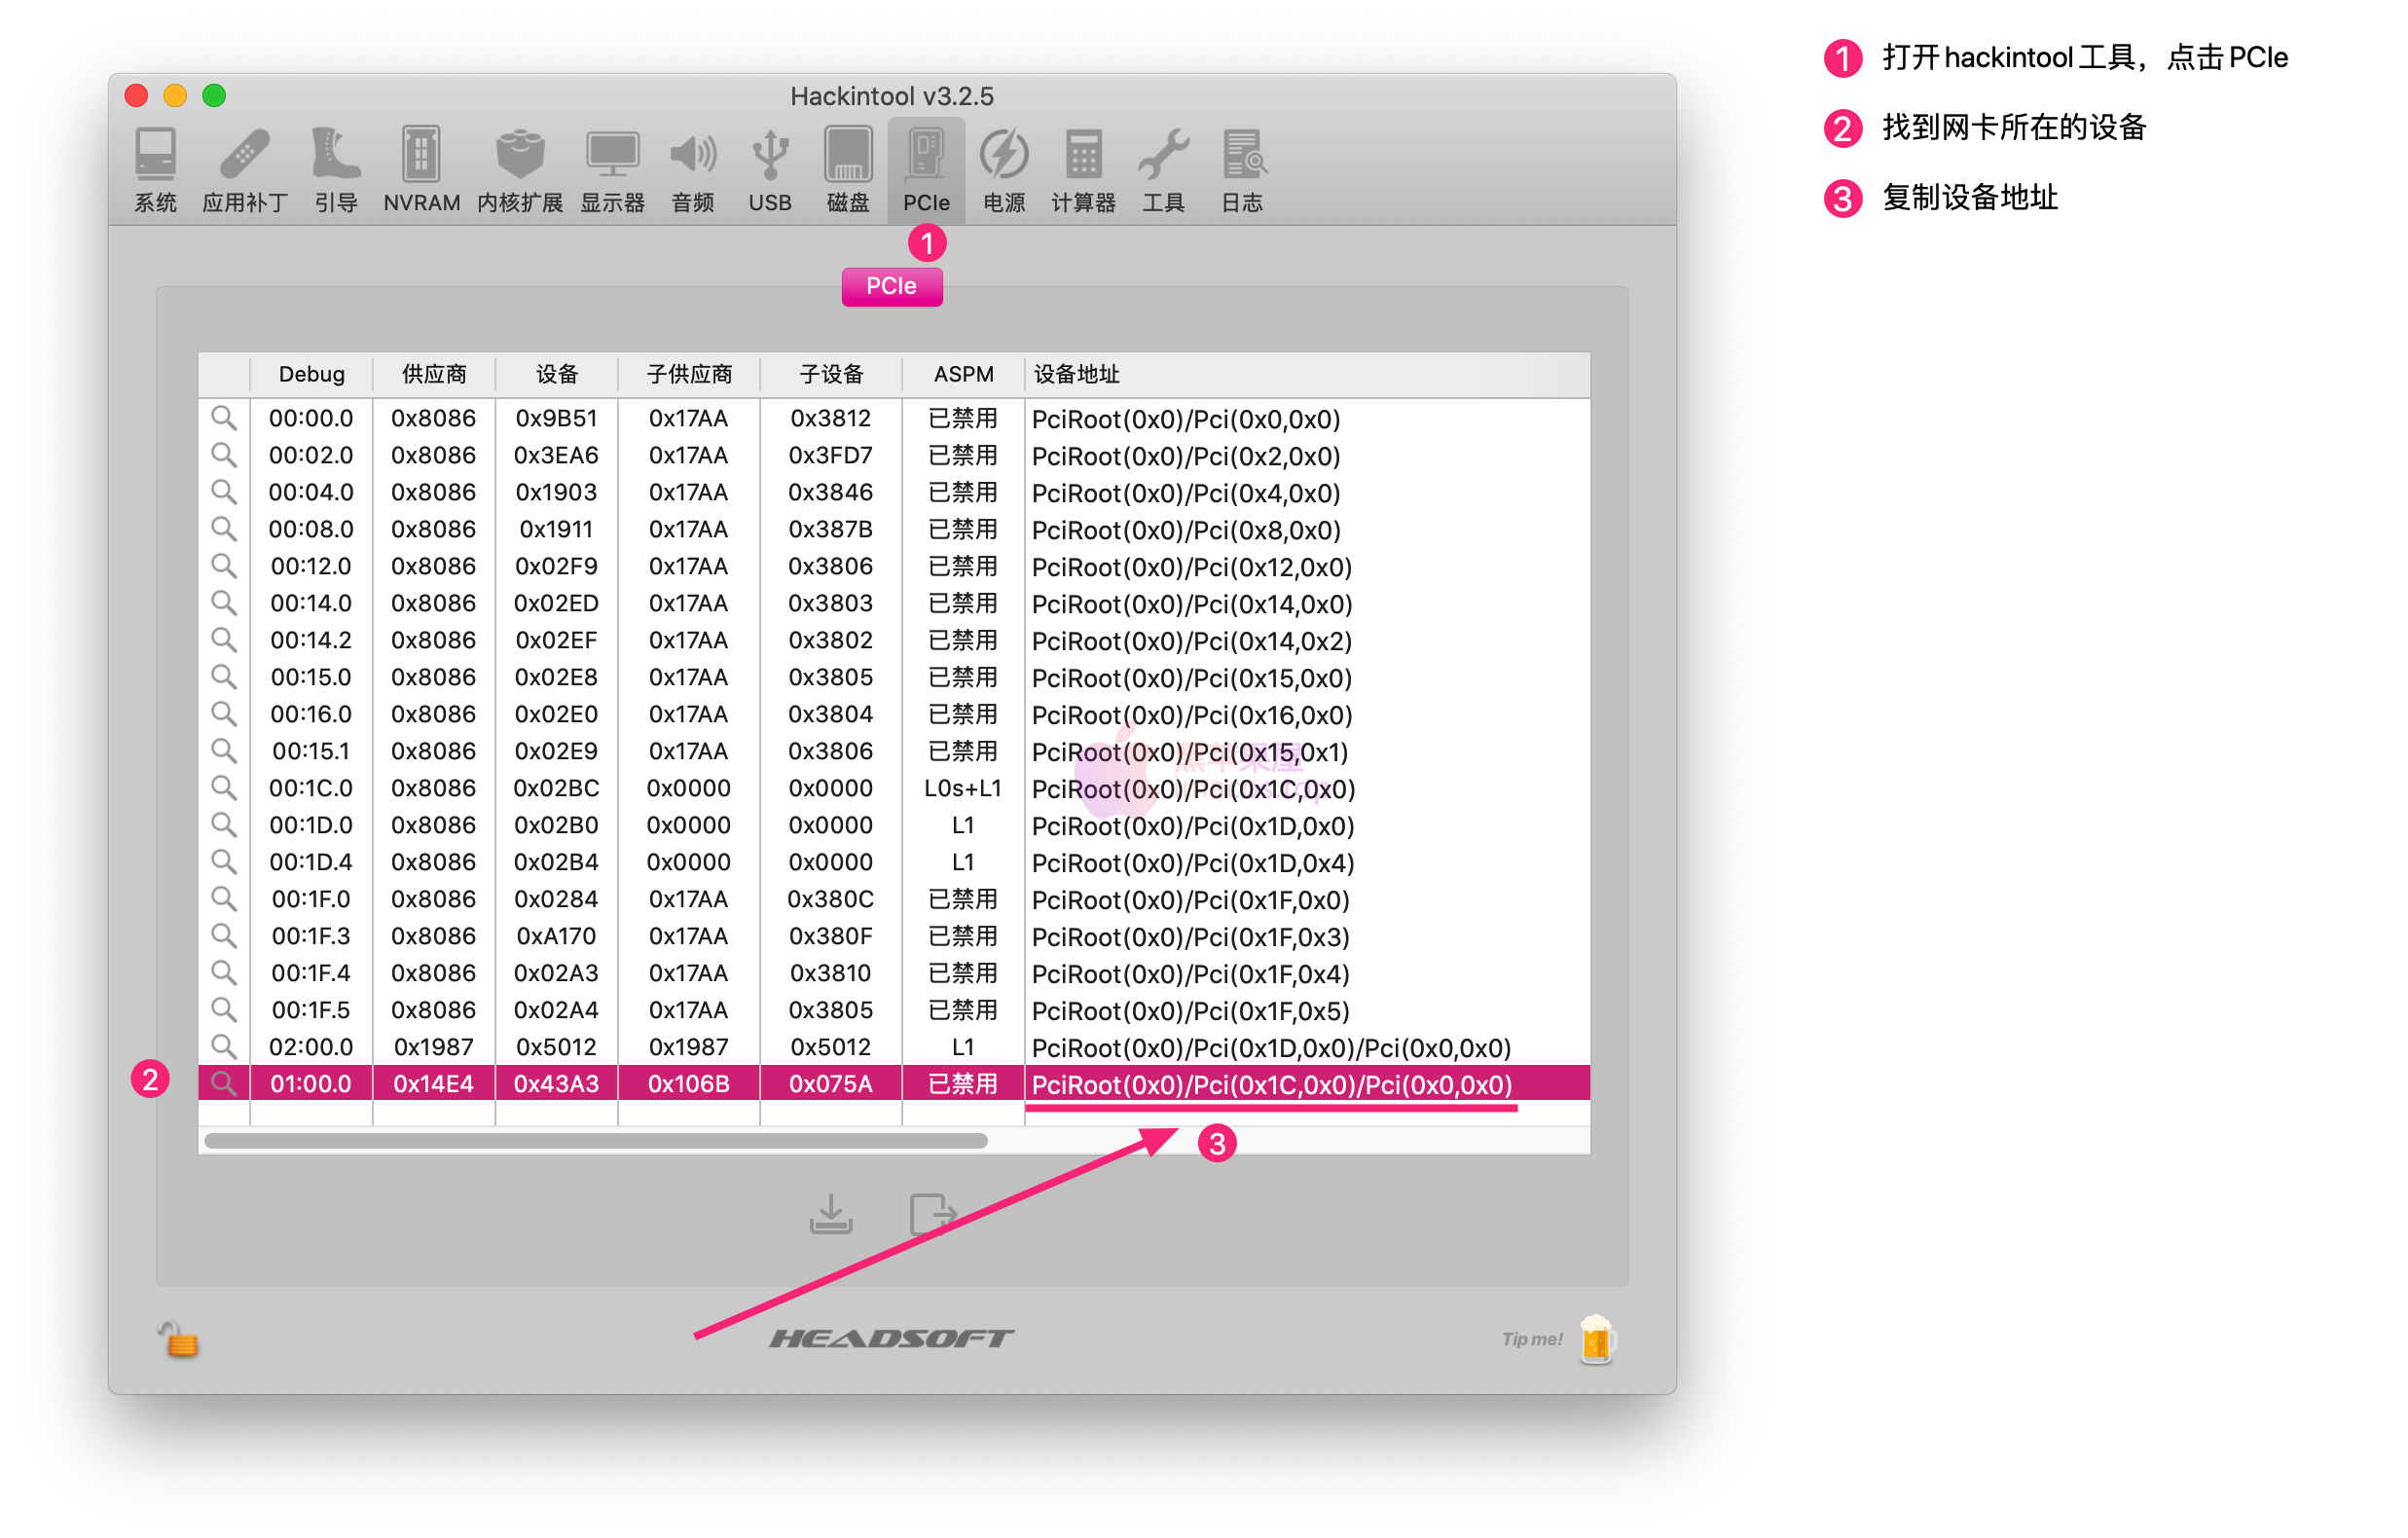
完整的config.plist源码如下:
1 2 3 4 5 6 7 8 9 10 11 12 13 14 15 16 17 18 19 20 21 22 23 24 25 26 |
# 新的驱动方法已经不需要再注入PCI设备信息了,该方法作废 > <plist version="1.0"> <dict> <key>Devices</key> <dict> <key>Properties</key> <dict> <key>PciRoot(0x0)/Pci(0x1c,0x0)/Pci(0x0)</key> <dict> <key>AAPL,slot-name</key> <string>WLAN</string> <key>compatible</key> <string>pci14e4,43a3</string> <key>device_type</key> <string>Airport Extreme</string> <key>model</key> <string>DW1820A (BCM4350) 802.11ac Wireless</string> <key>name</key> <string>Airport</string> </dict> </dict> </dict> </dict> </plist> |
请将该脚本合并到你的/EFI/CLOVER/config.plist中,不要直接替换。
请于/EFI/CLOVER/kexts/Other目录中添加驱动AirPortBrcmFixup v2.1.2
请于config.plist的boot-args中添加:brcmfx-country=#a和brcmfx-aspm,不会操作的请移步:
至此,您可以重启电脑,以使DW1820A的WIFI可以正常工作。
方法2 【OpenCore篇】
- 使用工具:
OpenCore Configurator,打开配置文件config.plist 跳转到DevicesProperties:在Add中,左侧添加网卡所在的设备地址:PciRoot(0x0)/Pci(0x1c,0x0)/Pci(0x0)右侧分别添加:
Key*ValueTypeAAPL,slot-nameWLANSTRINGcompatiblepci14e4,43a3STRINGdevice_typeAirport ExtremeSTRINGmodelDW1820A (BCM4350) 802.11ac WirelessSTRINGnameAirportSTRING
完成后的截图如下:

至于这个PciRoot(0x0)/Pci(0x1c,0x0)/Pci(0x0)是如何获得的,我们需要搬出工具Hackintool 在PCI信息里,点击网卡所在行,右键->Copy Device Path

跳转到:Kernel -> Add ->,添加AirportBrcmFixup驱动,按下图操作
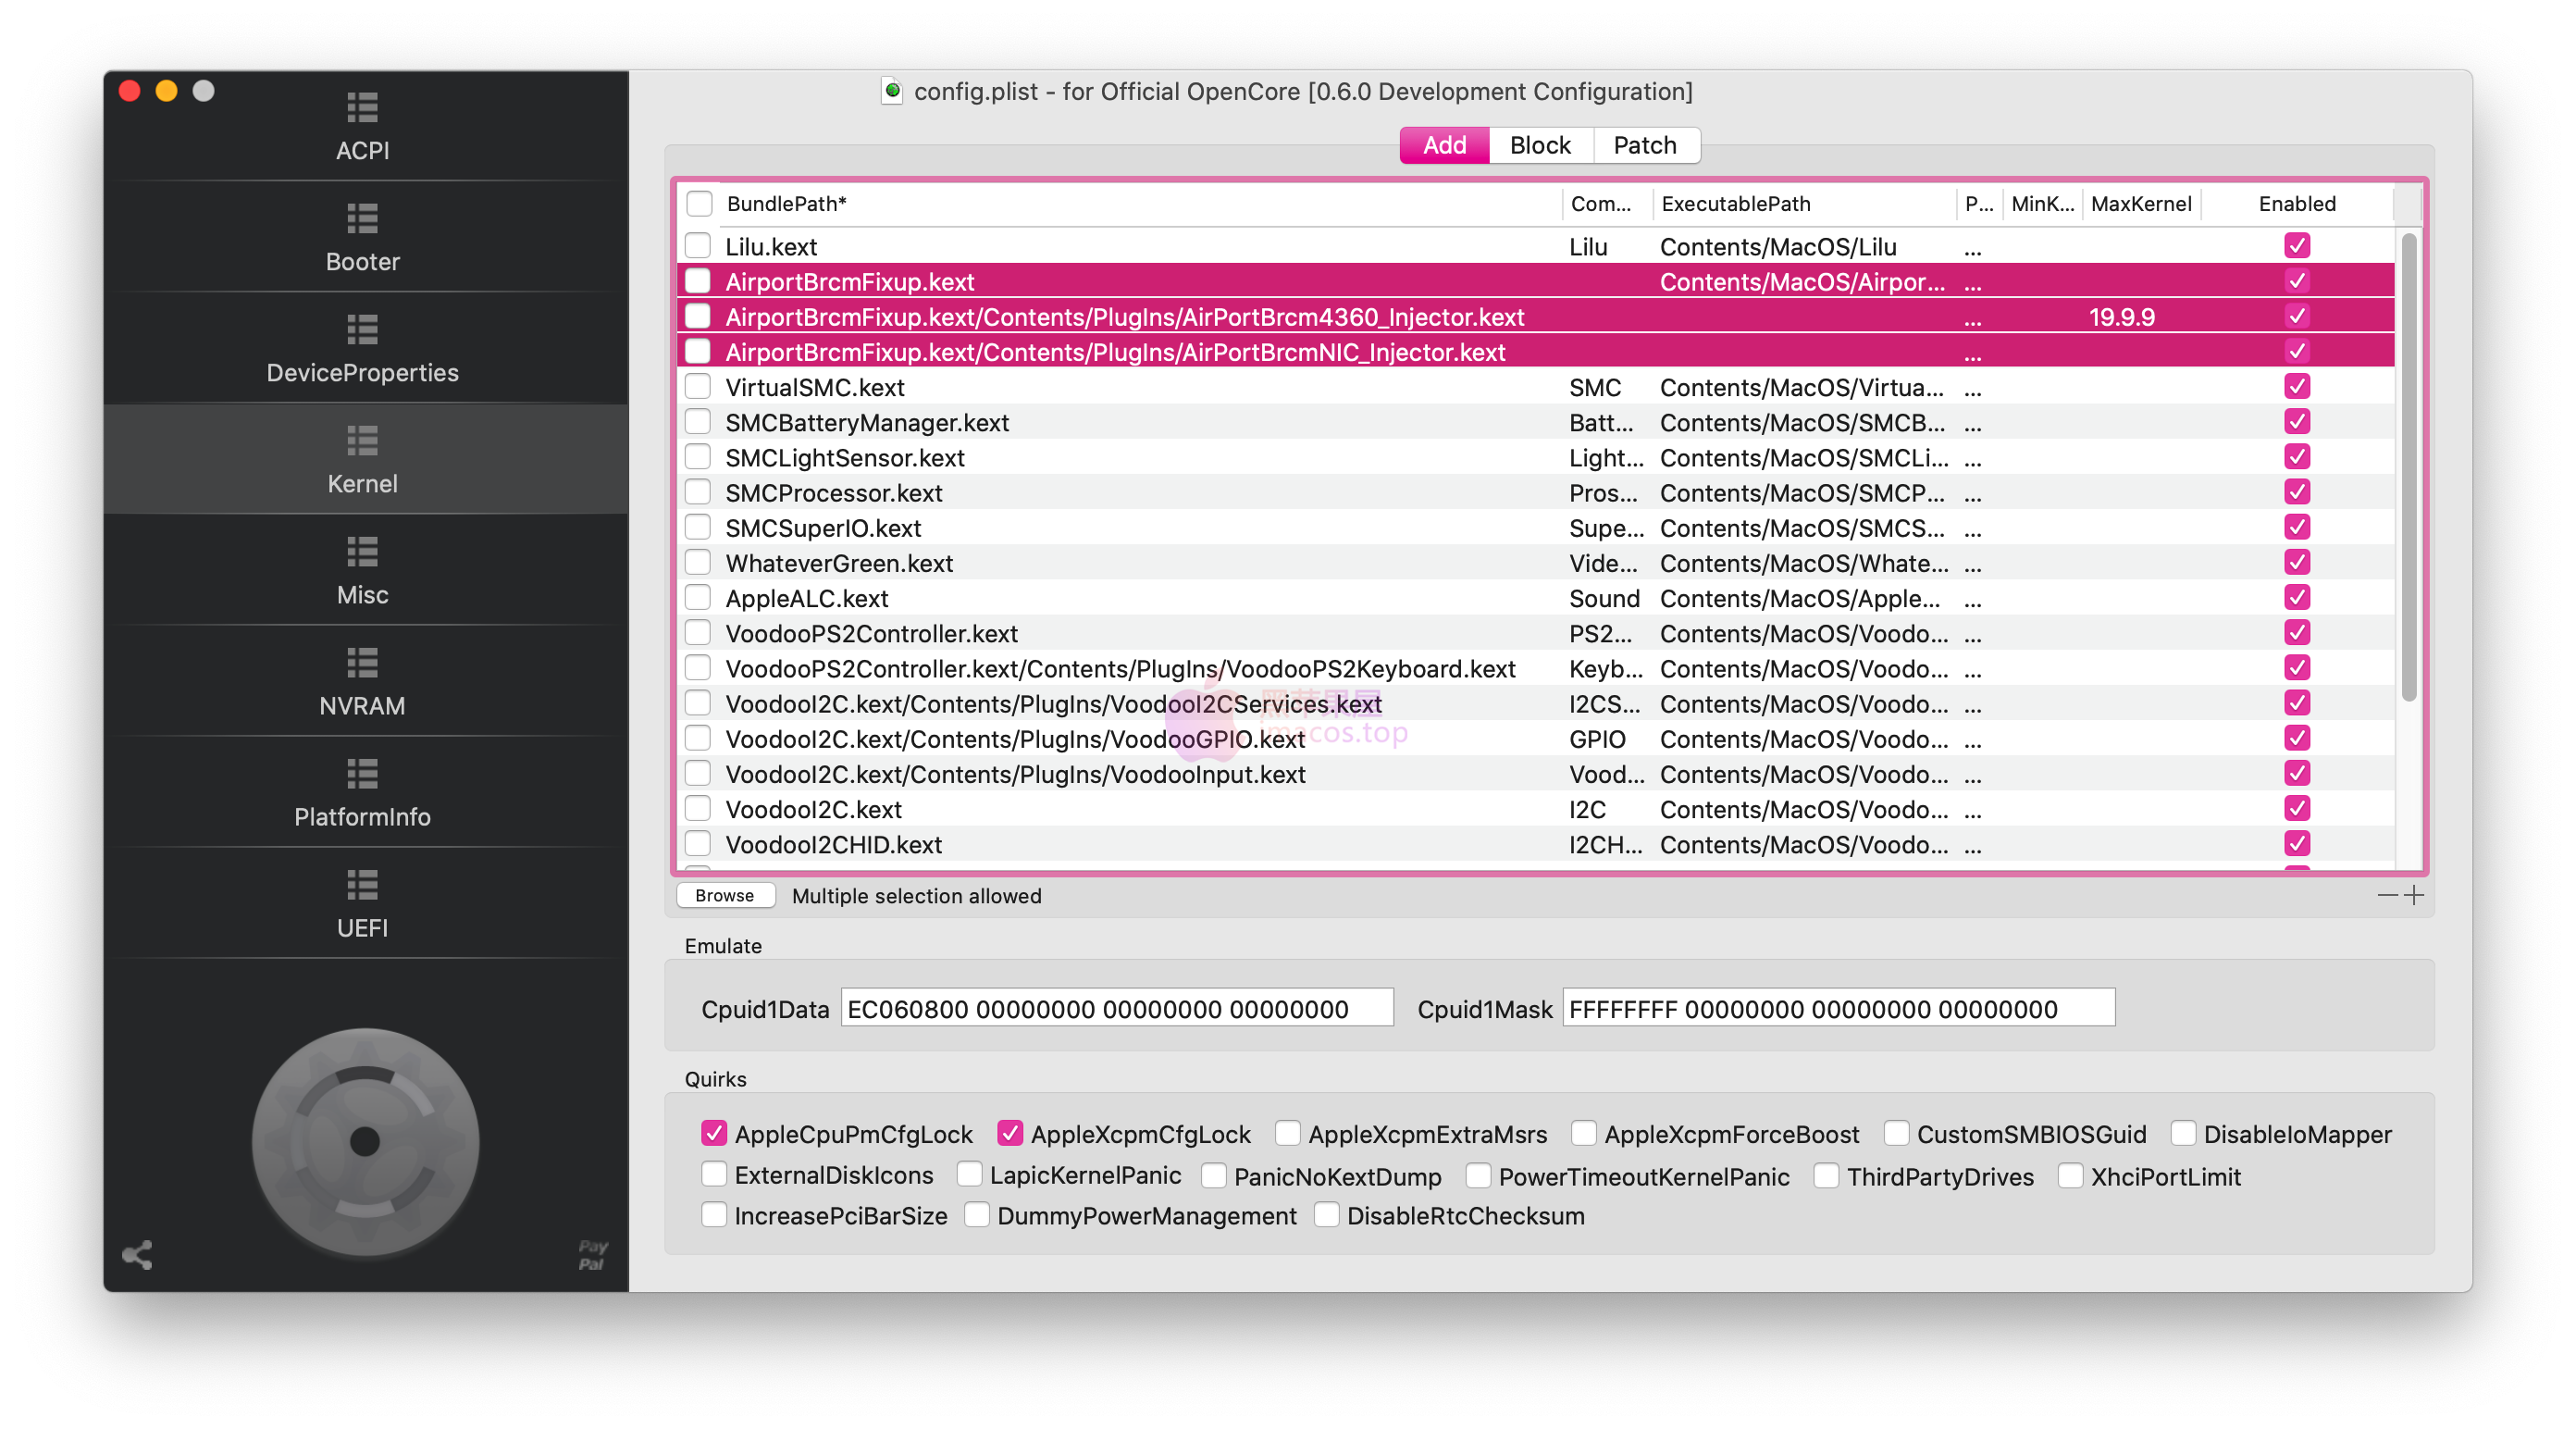
完整的config.plist源码如下:
1 2 3 4 5 6 7 8 9 10 11 12 13 14 15 16 17 18 19 20 21 22 23 24 25 26 27 28 29 30 31 32 33 34 35 36 37 38 39 40 41 42 43 44 45 46 47 48 49 50 51 52 53 54 55 56 57 58 59 |
<key>Kernel</key> <dict> <key>Add</key> <array> <dict> <key>Arch</key> <string>Any</string> <key>BundlePath</key> <string>AirportBrcmFixup.kext</string> <key>Comment</key> <string></string> <key>Enabled</key> <true/> <key>ExecutablePath</key> <string>Contents/MacOS/AirportBrcmFixup</string> <key>MaxKernel</key> <string></string> <key>MinKernel</key> <string></string> <key>PlistPath</key> <string>Contents/Info.plist</string> </dict> <dict> <key>Arch</key> <string>Any</string> <key>BundlePath</key> <string>AirportBrcmFixup.kext/Contents/PlugIns/AirPortBrcm4360_Injector.kext</string> <key>Comment</key> <string></string> <key>Enabled</key> <true/> <key>ExecutablePath</key> <string></string> <key>MaxKernel</key> <string>19.99.99</string> <key>MinKernel</key> <string></string> <key>PlistPath</key> <string>Contents/Info.plist</string> </dict> <dict> <key>Arch</key> <string>Any</string> <key>BundlePath</key> <string>AirportBrcmFixup.kext/Contents/PlugIns/AirPortBrcmNIC_Injector.kext</string> <key>Comment</key> <string></string> <key>Enabled</key> <true/> <key>ExecutablePath</key> <string></string> <key>MaxKernel</key> <string></string> <key>MinKernel</key> <string></string> <key>PlistPath</key> <string>Contents/Info.plist</string> </dict> <array> |
- 国家代码注入:
- 请于
NVRAM->Add->UUID:->7C436110-AB2A-4BBB-A880-FE41995C9F82->boot-args中添加:brcmfx-country=#a和brcmfx-aspm
- 请于
- 请于
/EFI/OC/Kexts目录中添加驱动AirPortBrcmFixupv2.1.2
Bluetooth蓝牙
CLOVER:
将【DW1820A蓝牙专用程序】 解压缩到/EFI/CLOVER/kexts/Other目录下,重启即可。
- 稳定版本:
v2.5.5将联想版493/494蓝牙固件更改为v7 c4689- DW1820A_BT_for_Mojave_v2.5.5.zip 支持10.14及以下版本
- DW1820A_BT_for_Catalina_and_BigSur_v2.5.5.zip 支持10.15及以上版本
如果蓝牙睡眠唤醒后无法工作,请于
config.plist中添加引导参数:bpr_probedelay=100 bpr_initialdelay=300 bpr_postresetdelay=300
OpenCore:
- 将【DW1820A蓝牙专用程序】 解压缩到
/EFI/OC/Kexts目录下 - 稳定版本:
v2.5.5将联想版493/494蓝牙固件更改为v7 c4689- DW1820A_BT_for_Mojave_v2.5.5.zip 支持10.14及以下版本
- DW1820A_BT_for_Catalina_and_BigSur_v2.5.5.zip 支持10.15及以上版本
Kernel->Add->Browse,将/EFI/OC/Kexts目录下的BrcmBluetoothInjector.kext/BrcmFirmwareData.kext/BrcmPatchRAM3.kext添加进列表中,注意加载的顺序(如果在 macOS Monterey 及更高版本上蓝牙不可用,可以定制USB接口(教程链接:http://imacos.top/2022/08/22/windows-usb-macos-bigsur-11-3-usbtoolbox/),并启用BlueToolFixup.Kext驱动)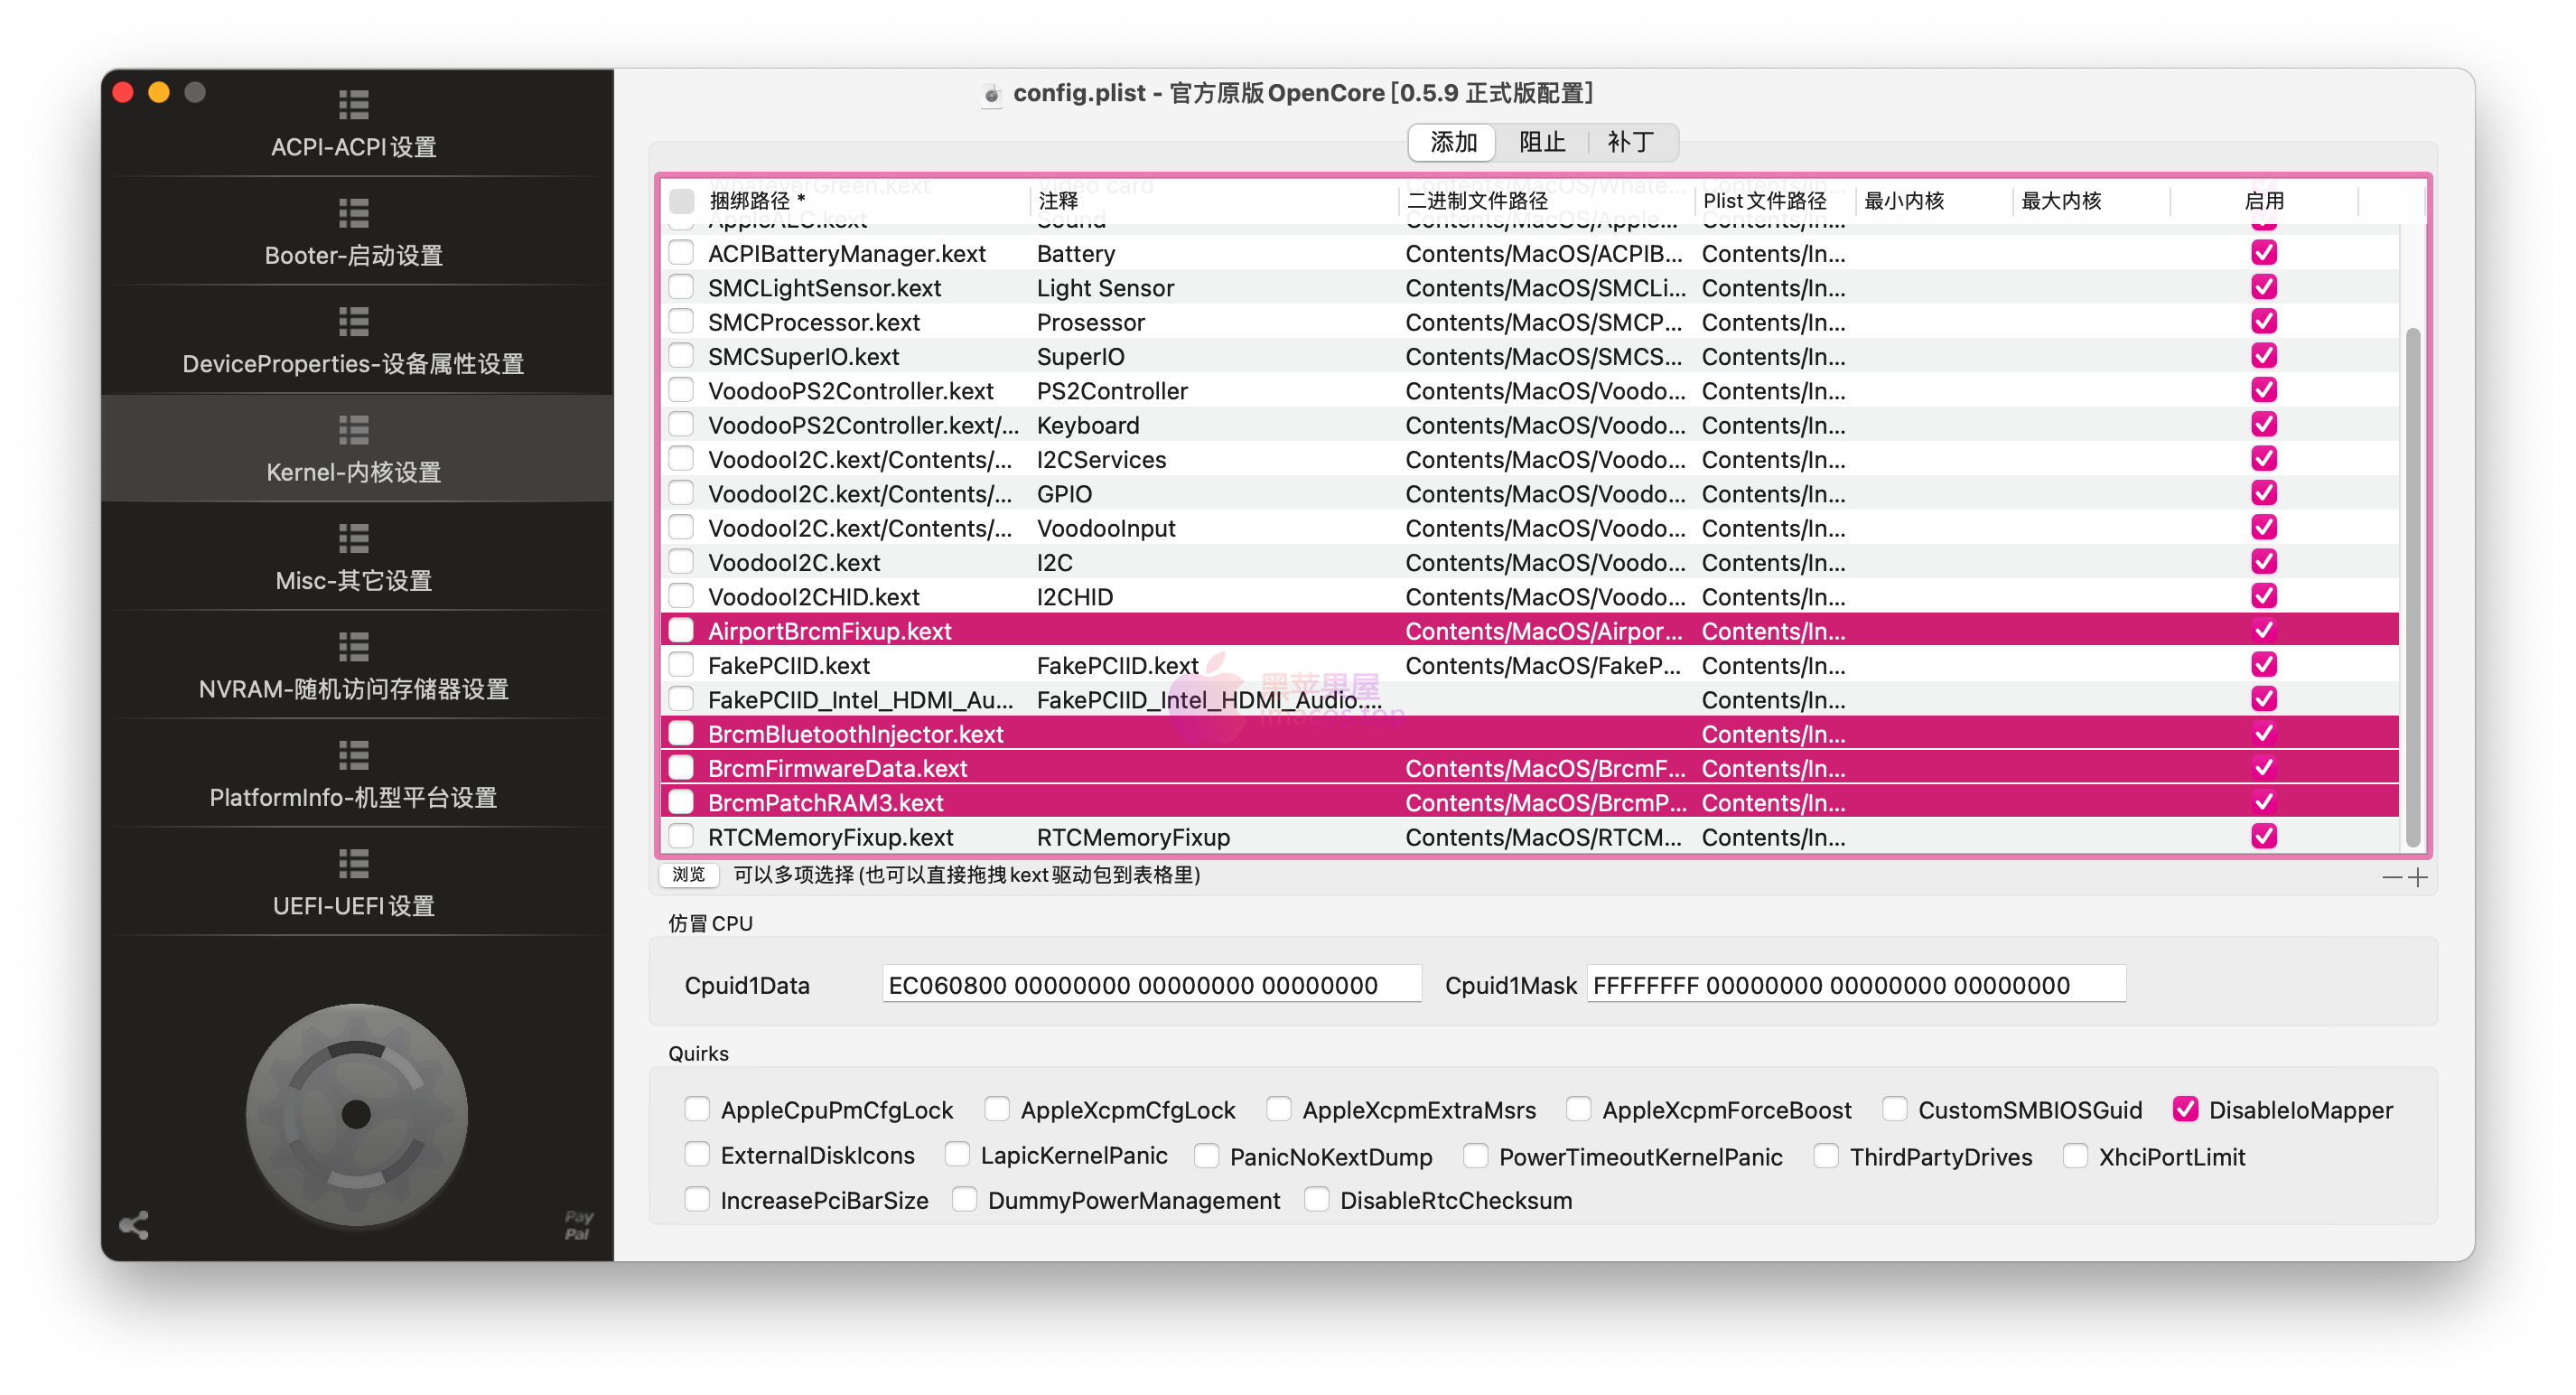
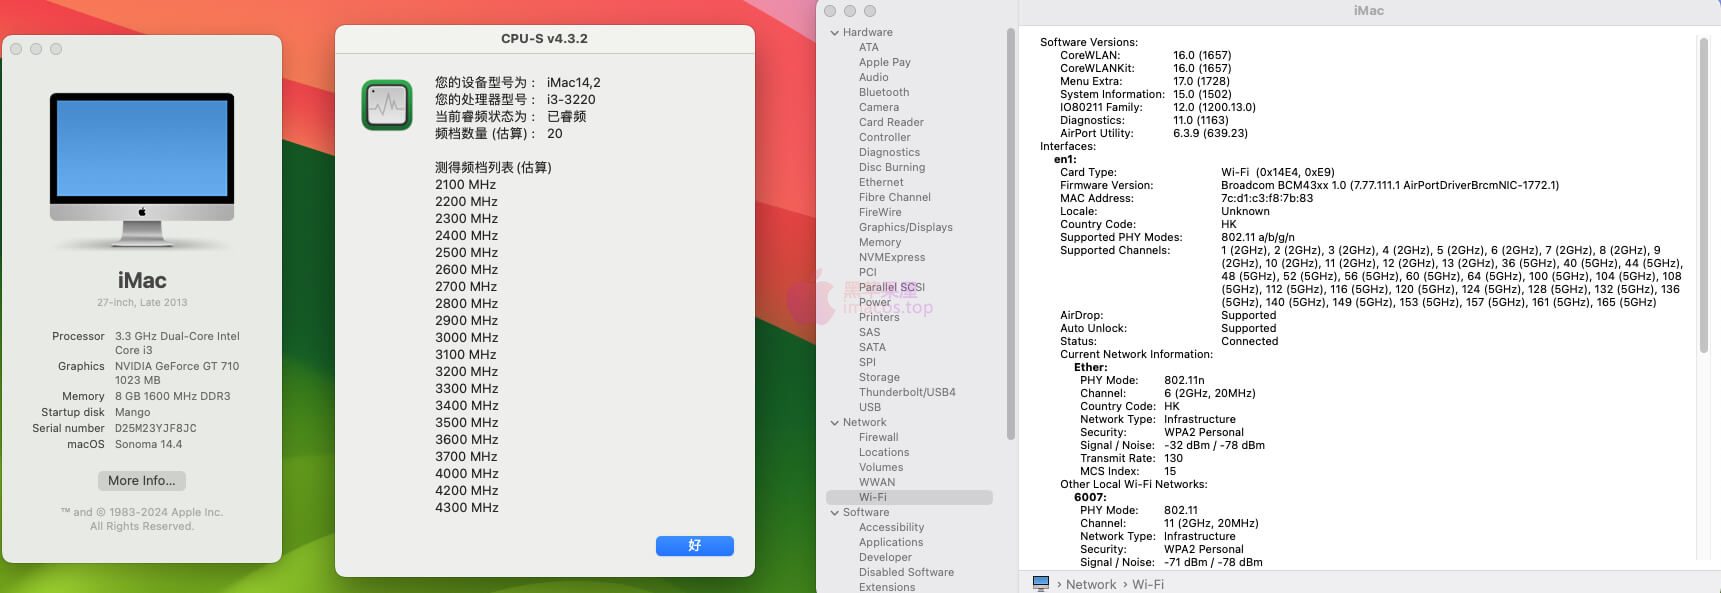
截图
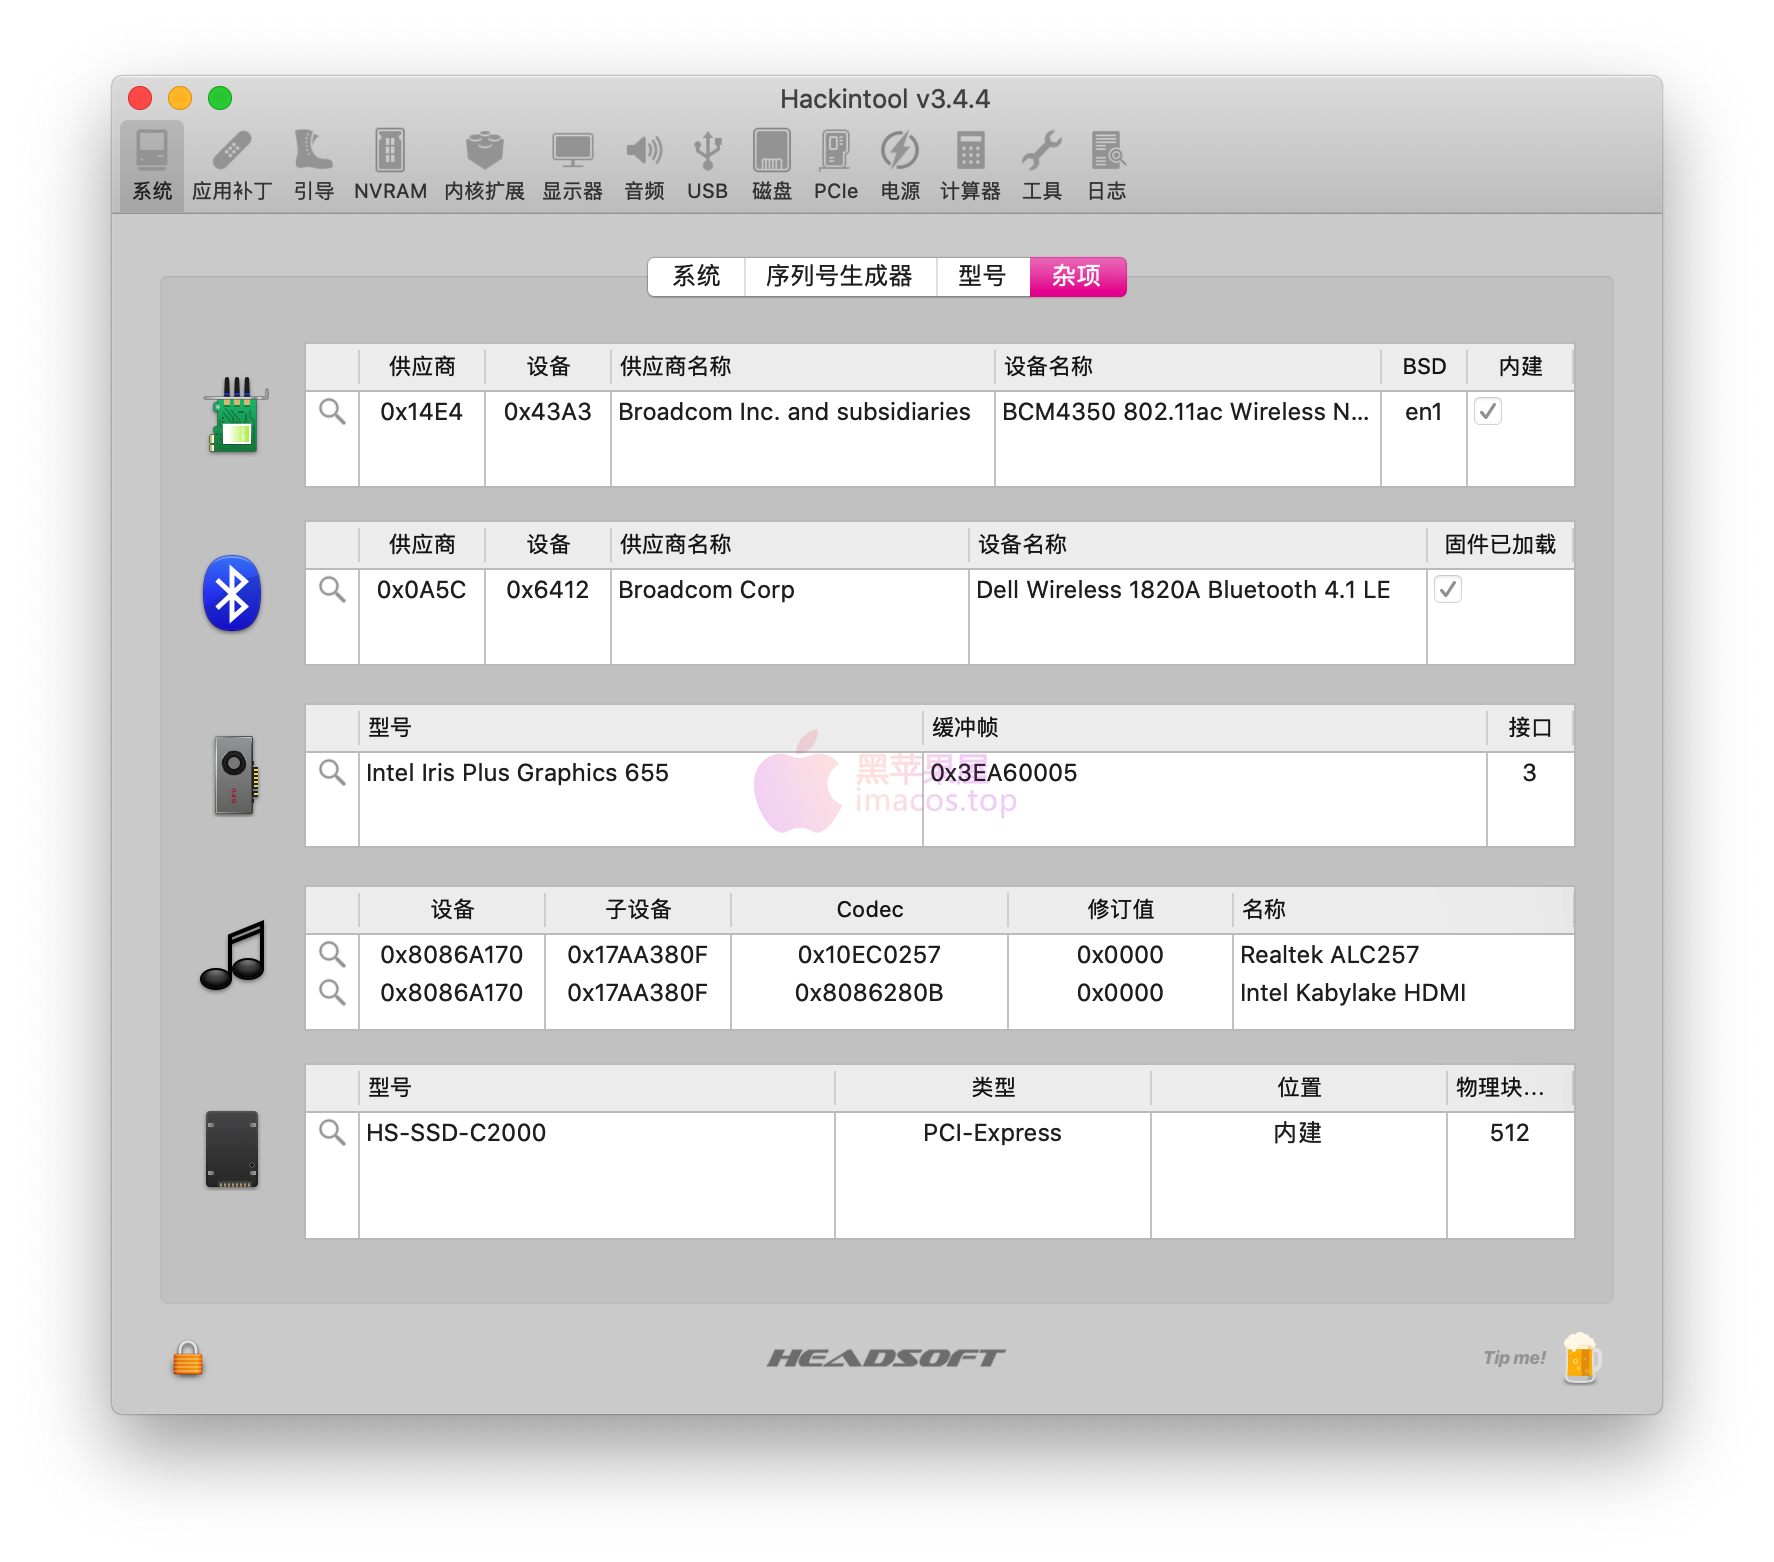
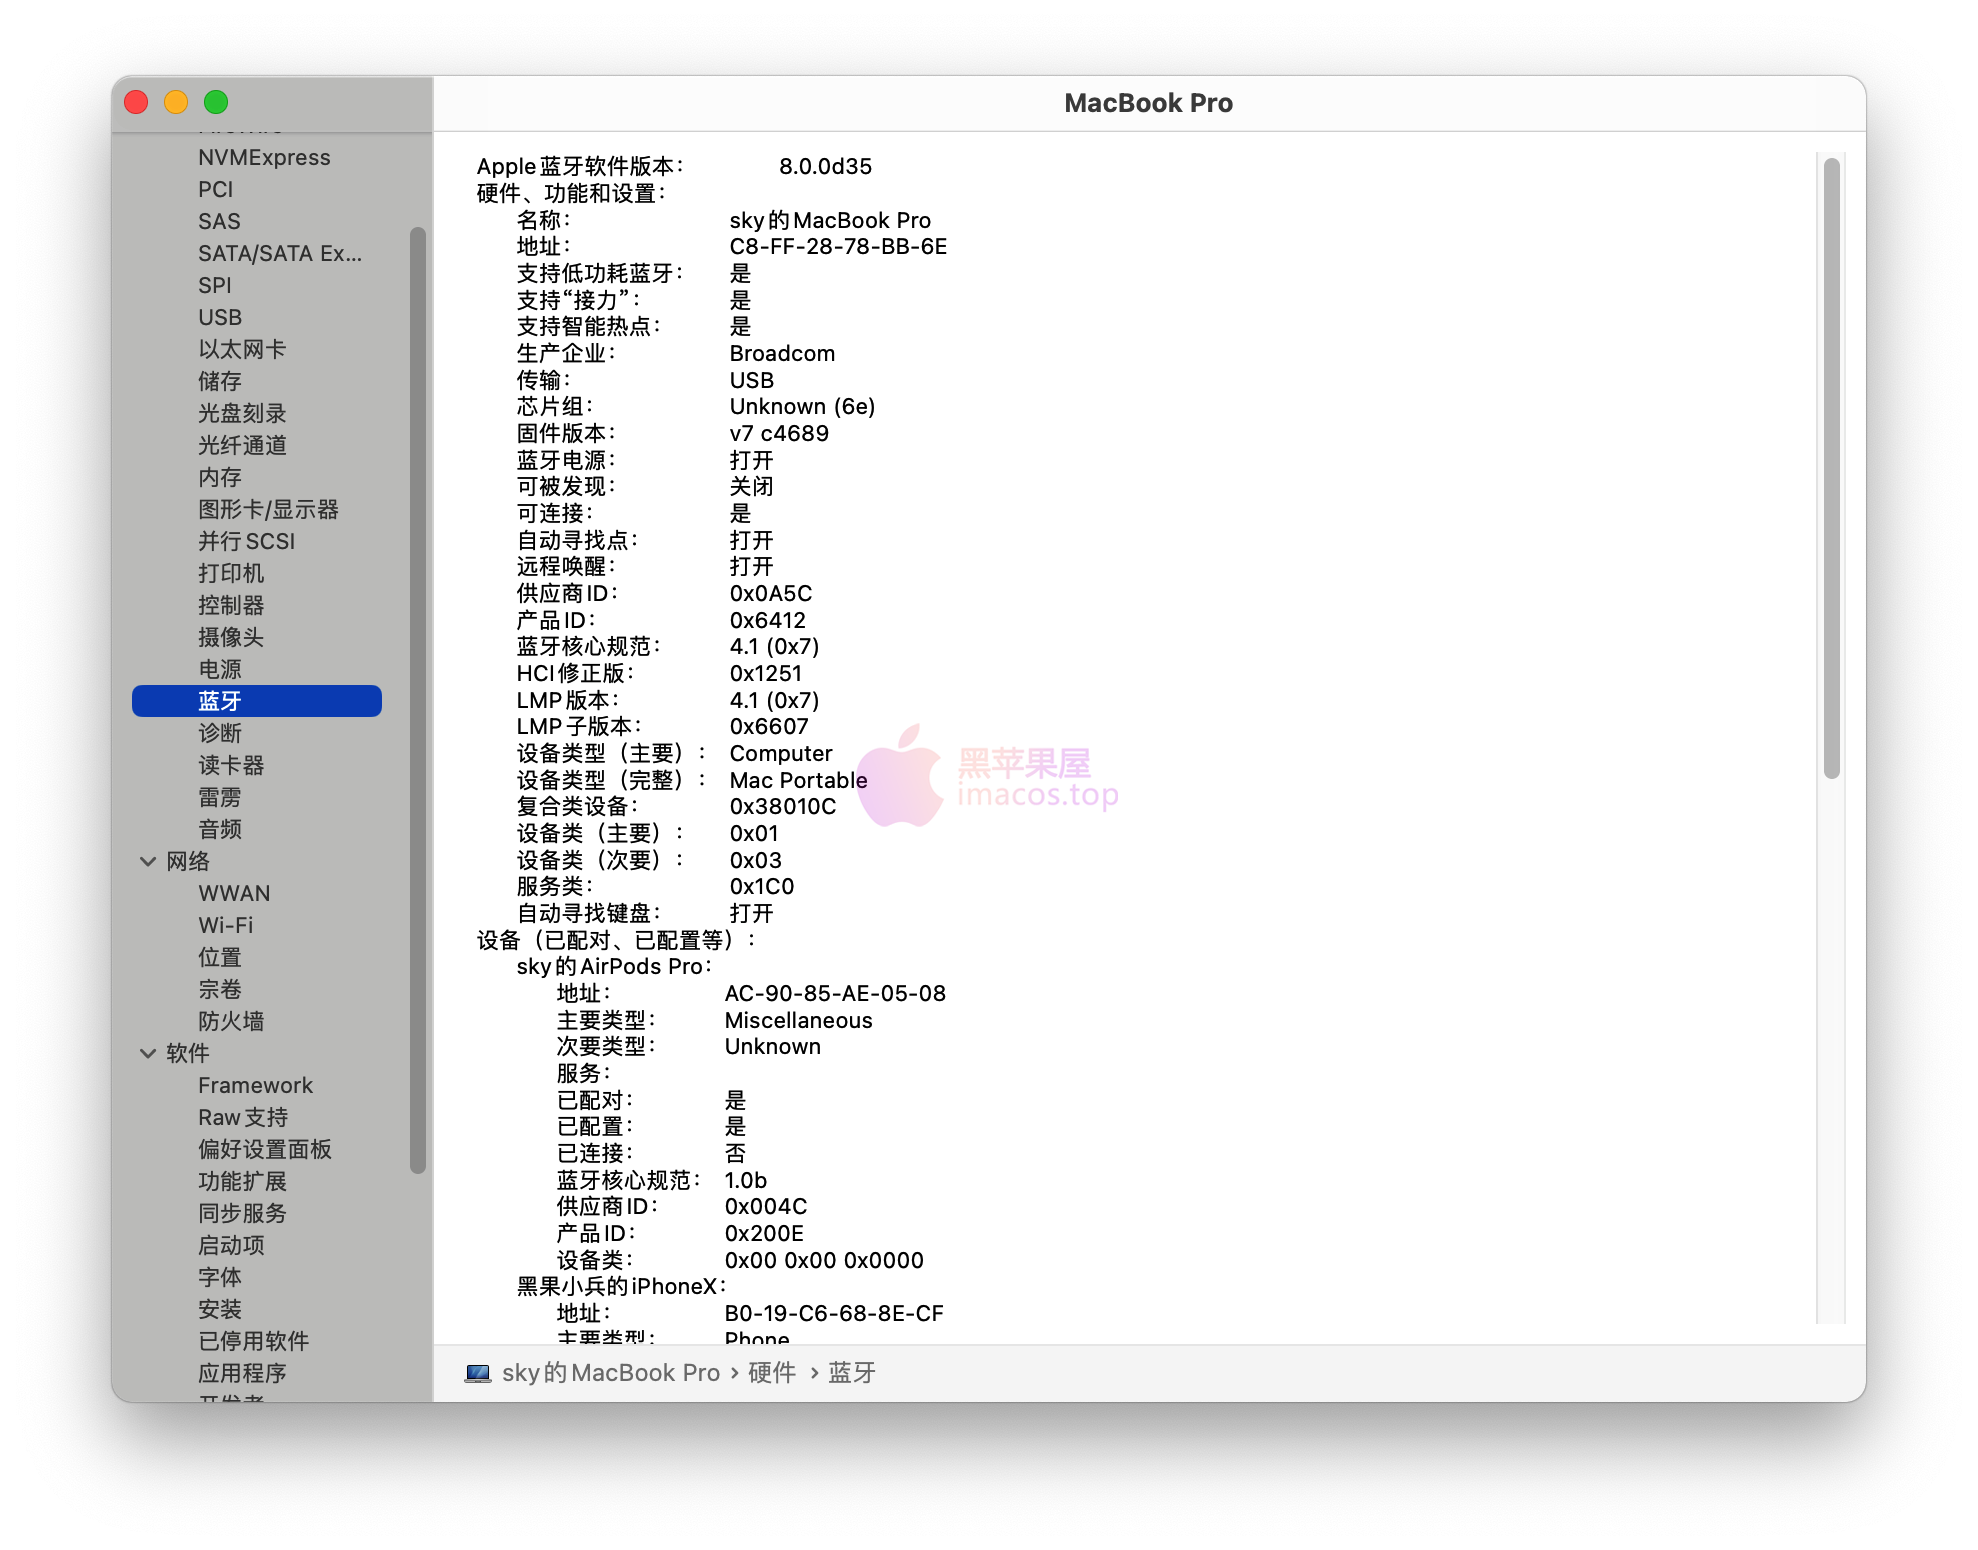

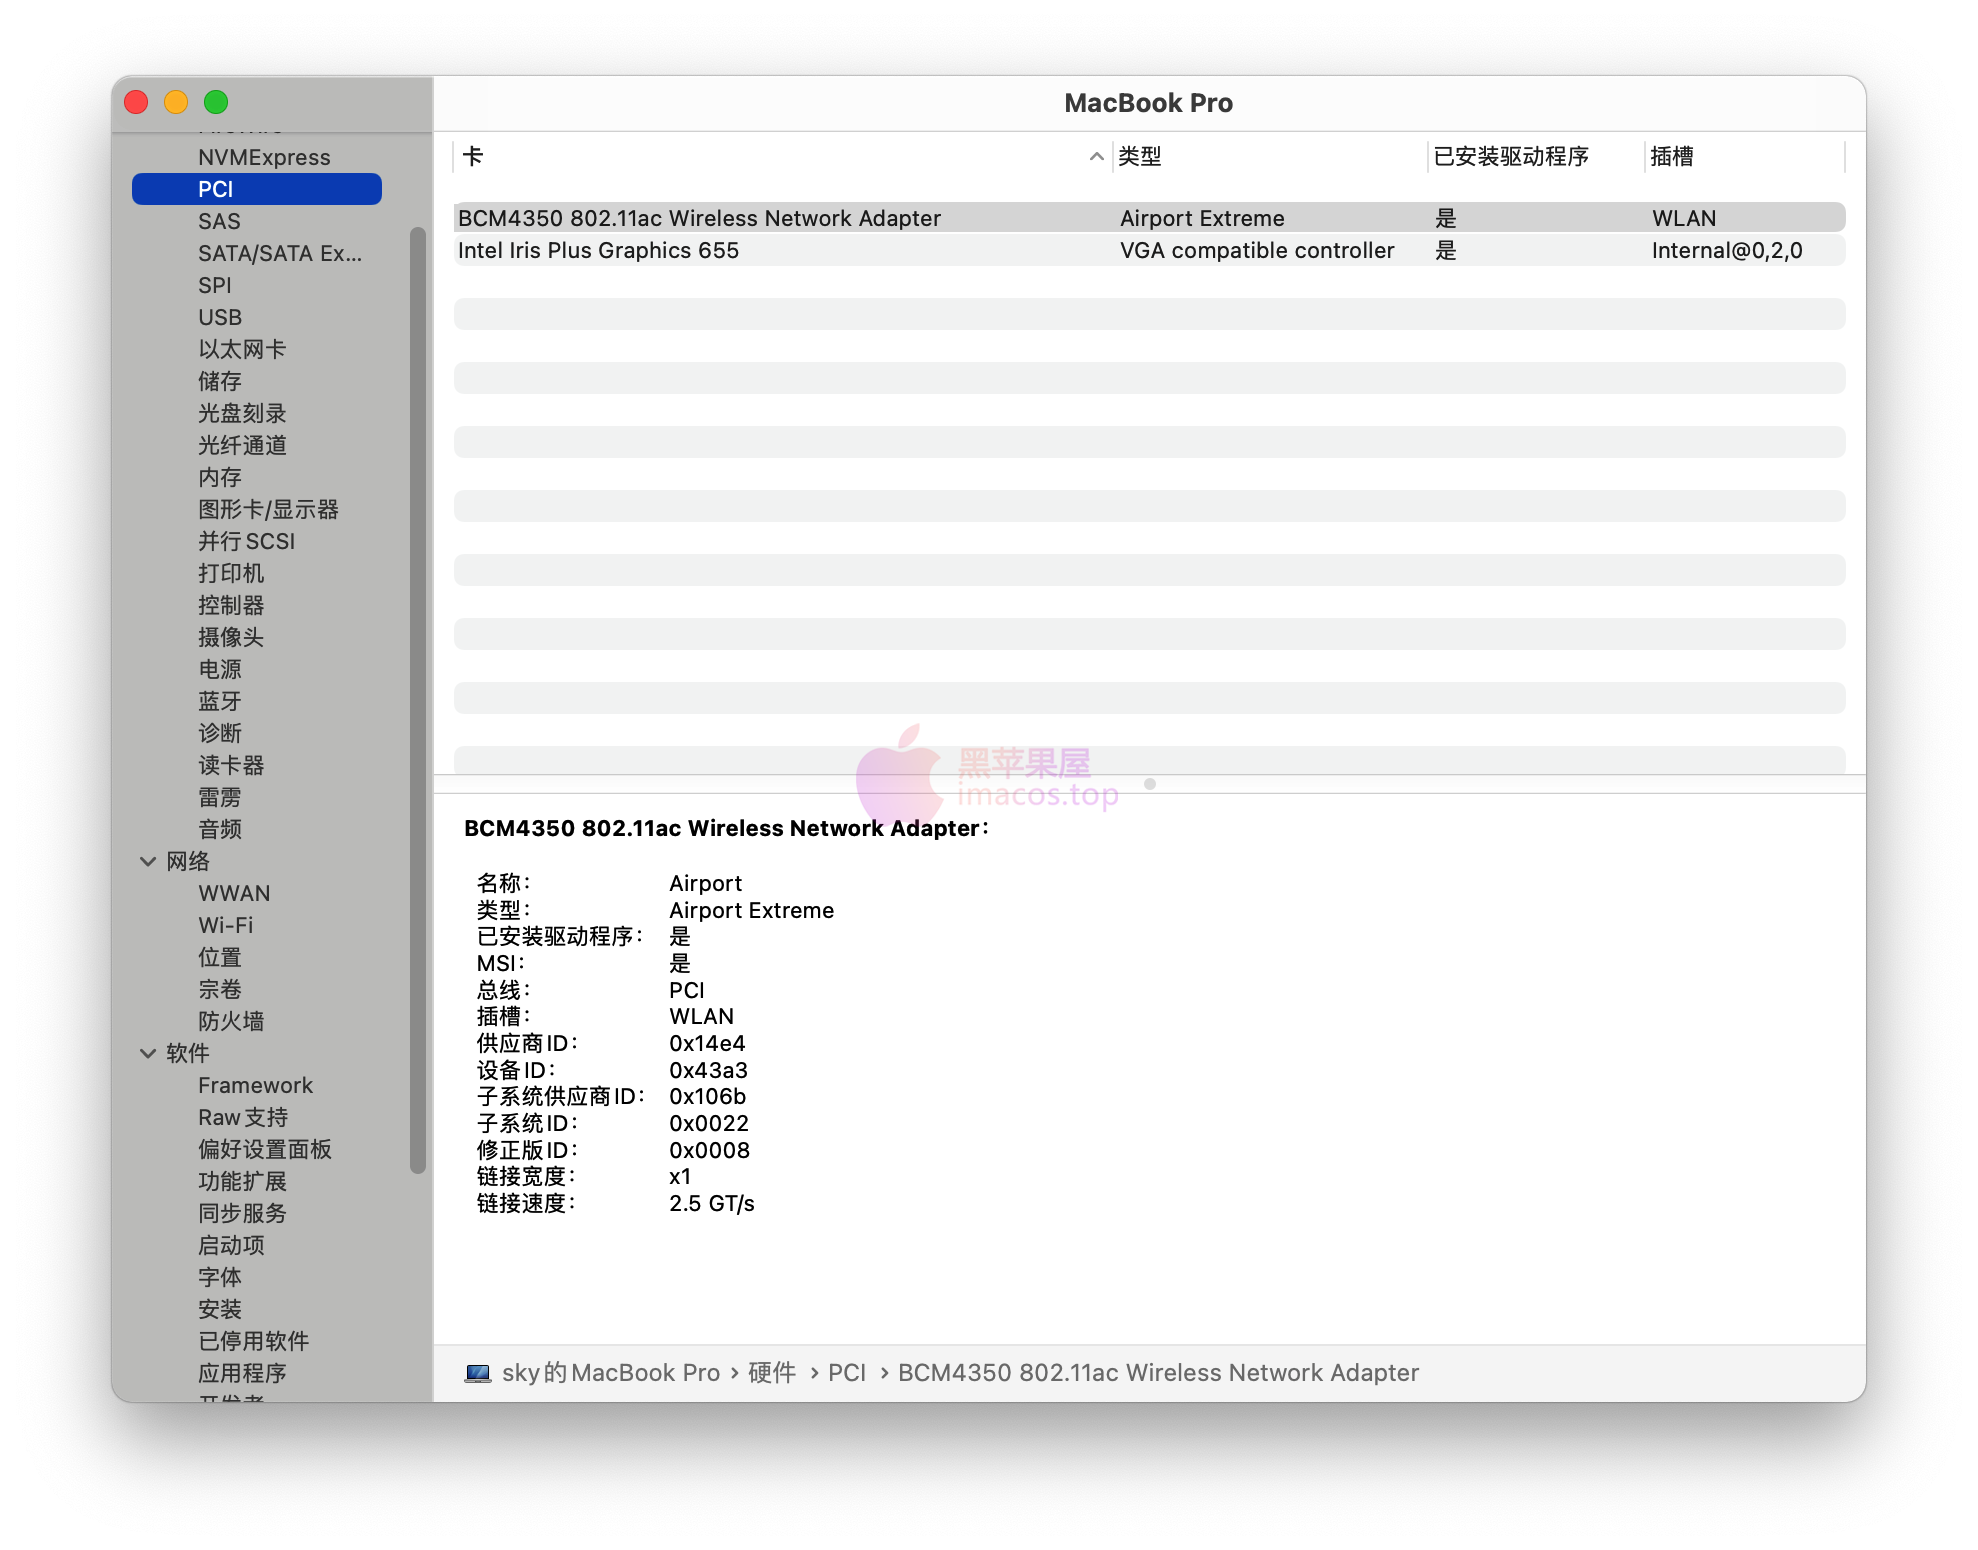
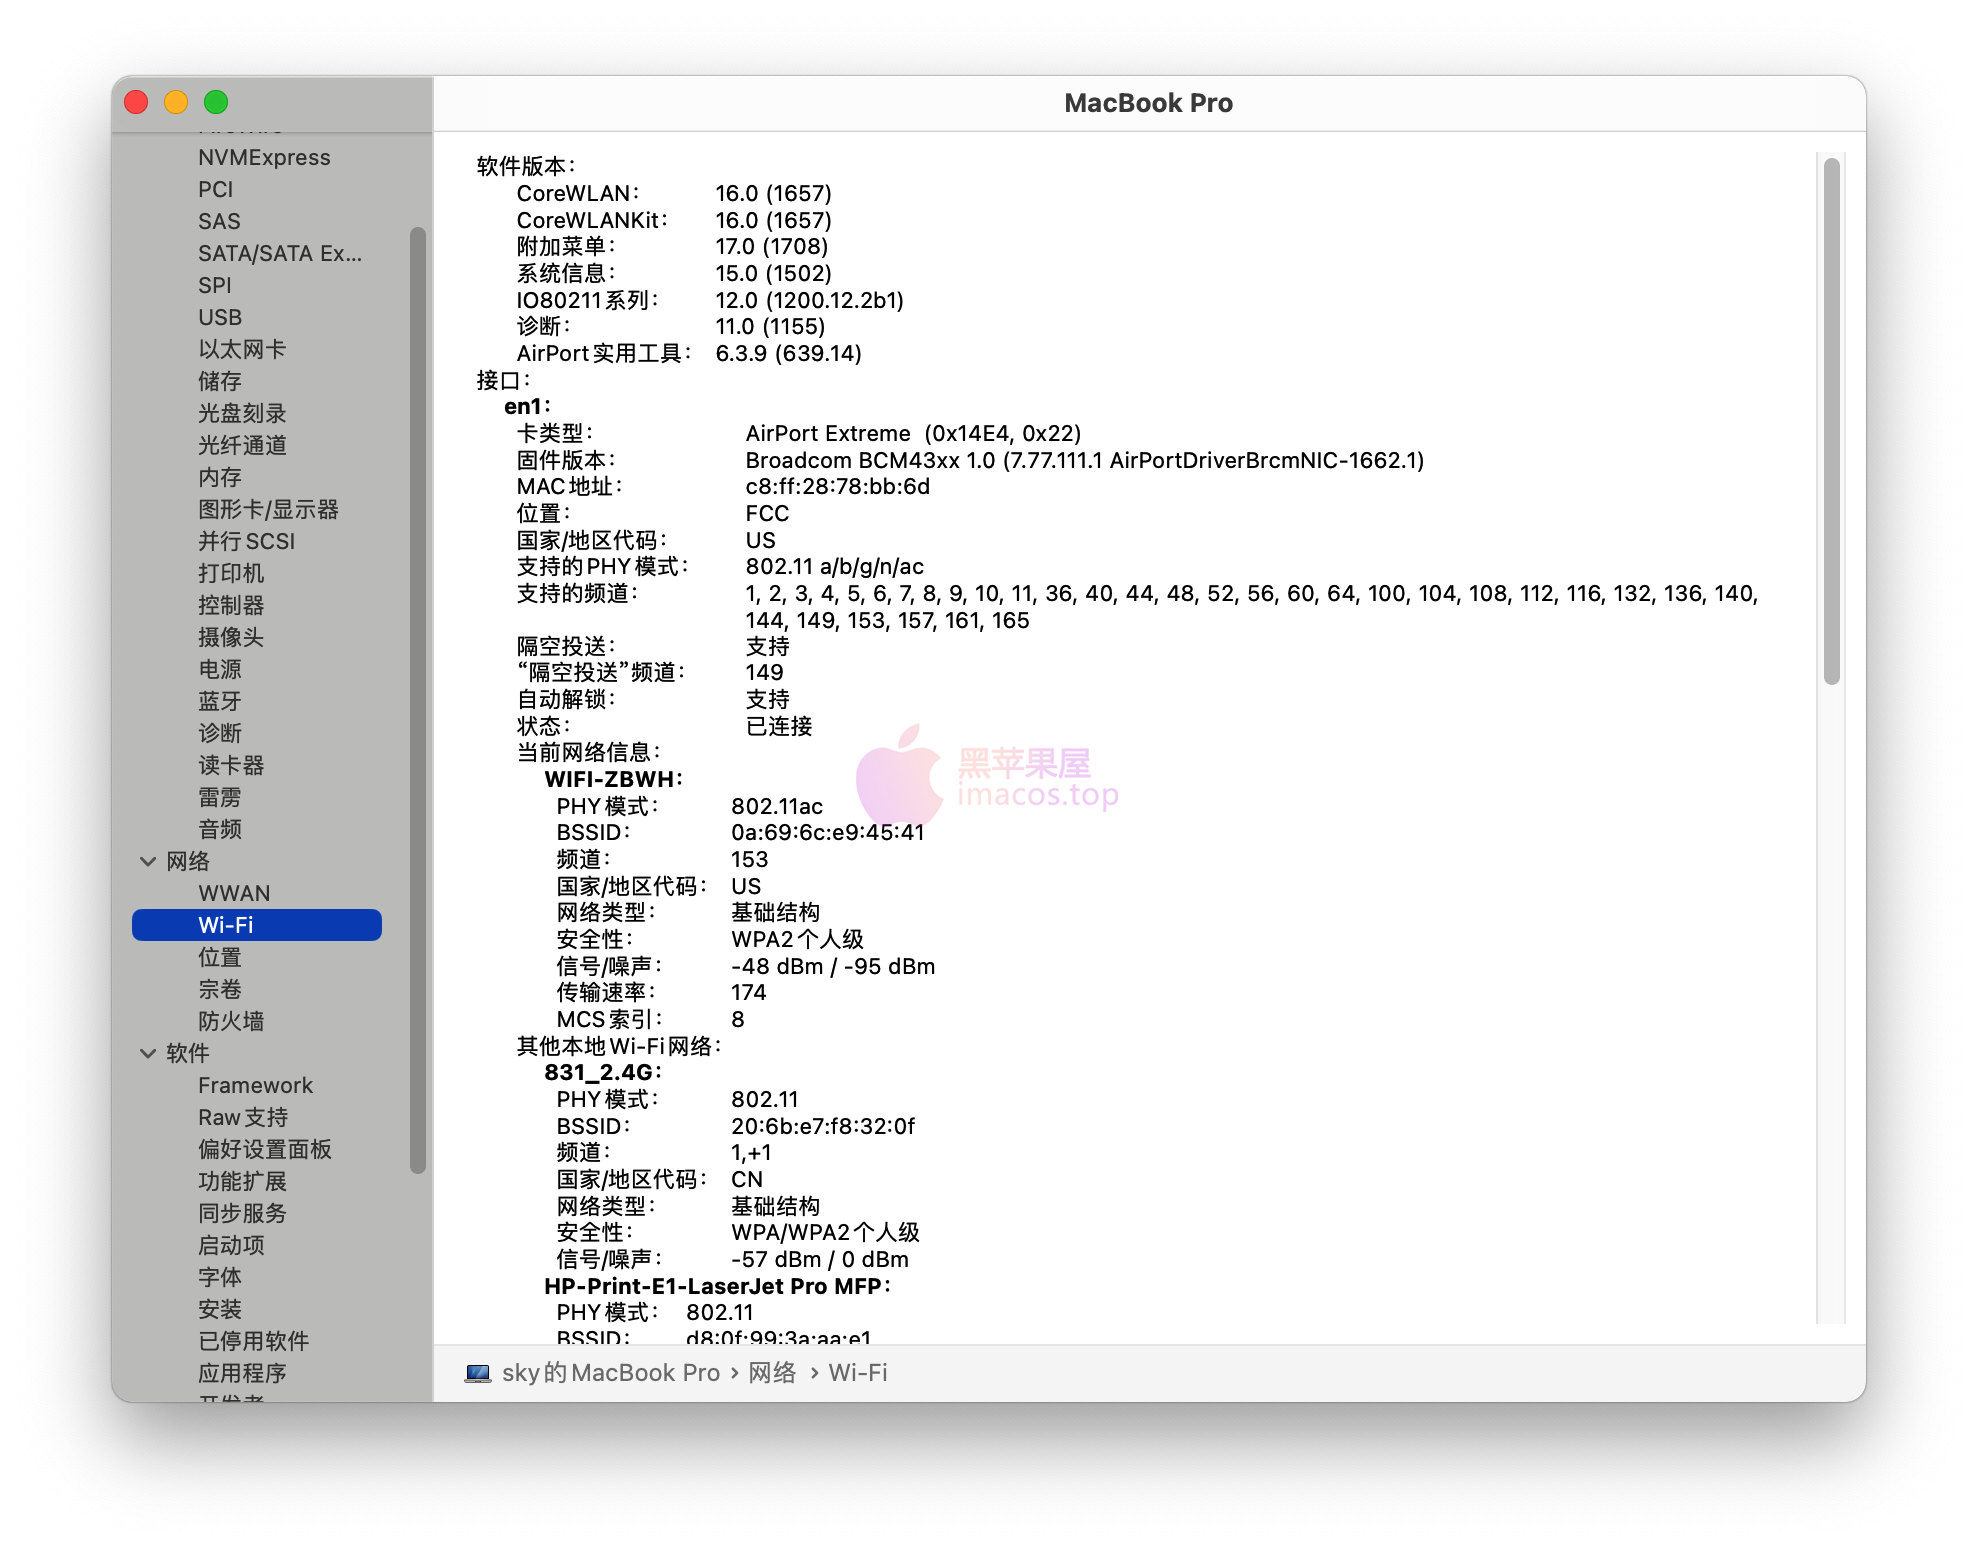
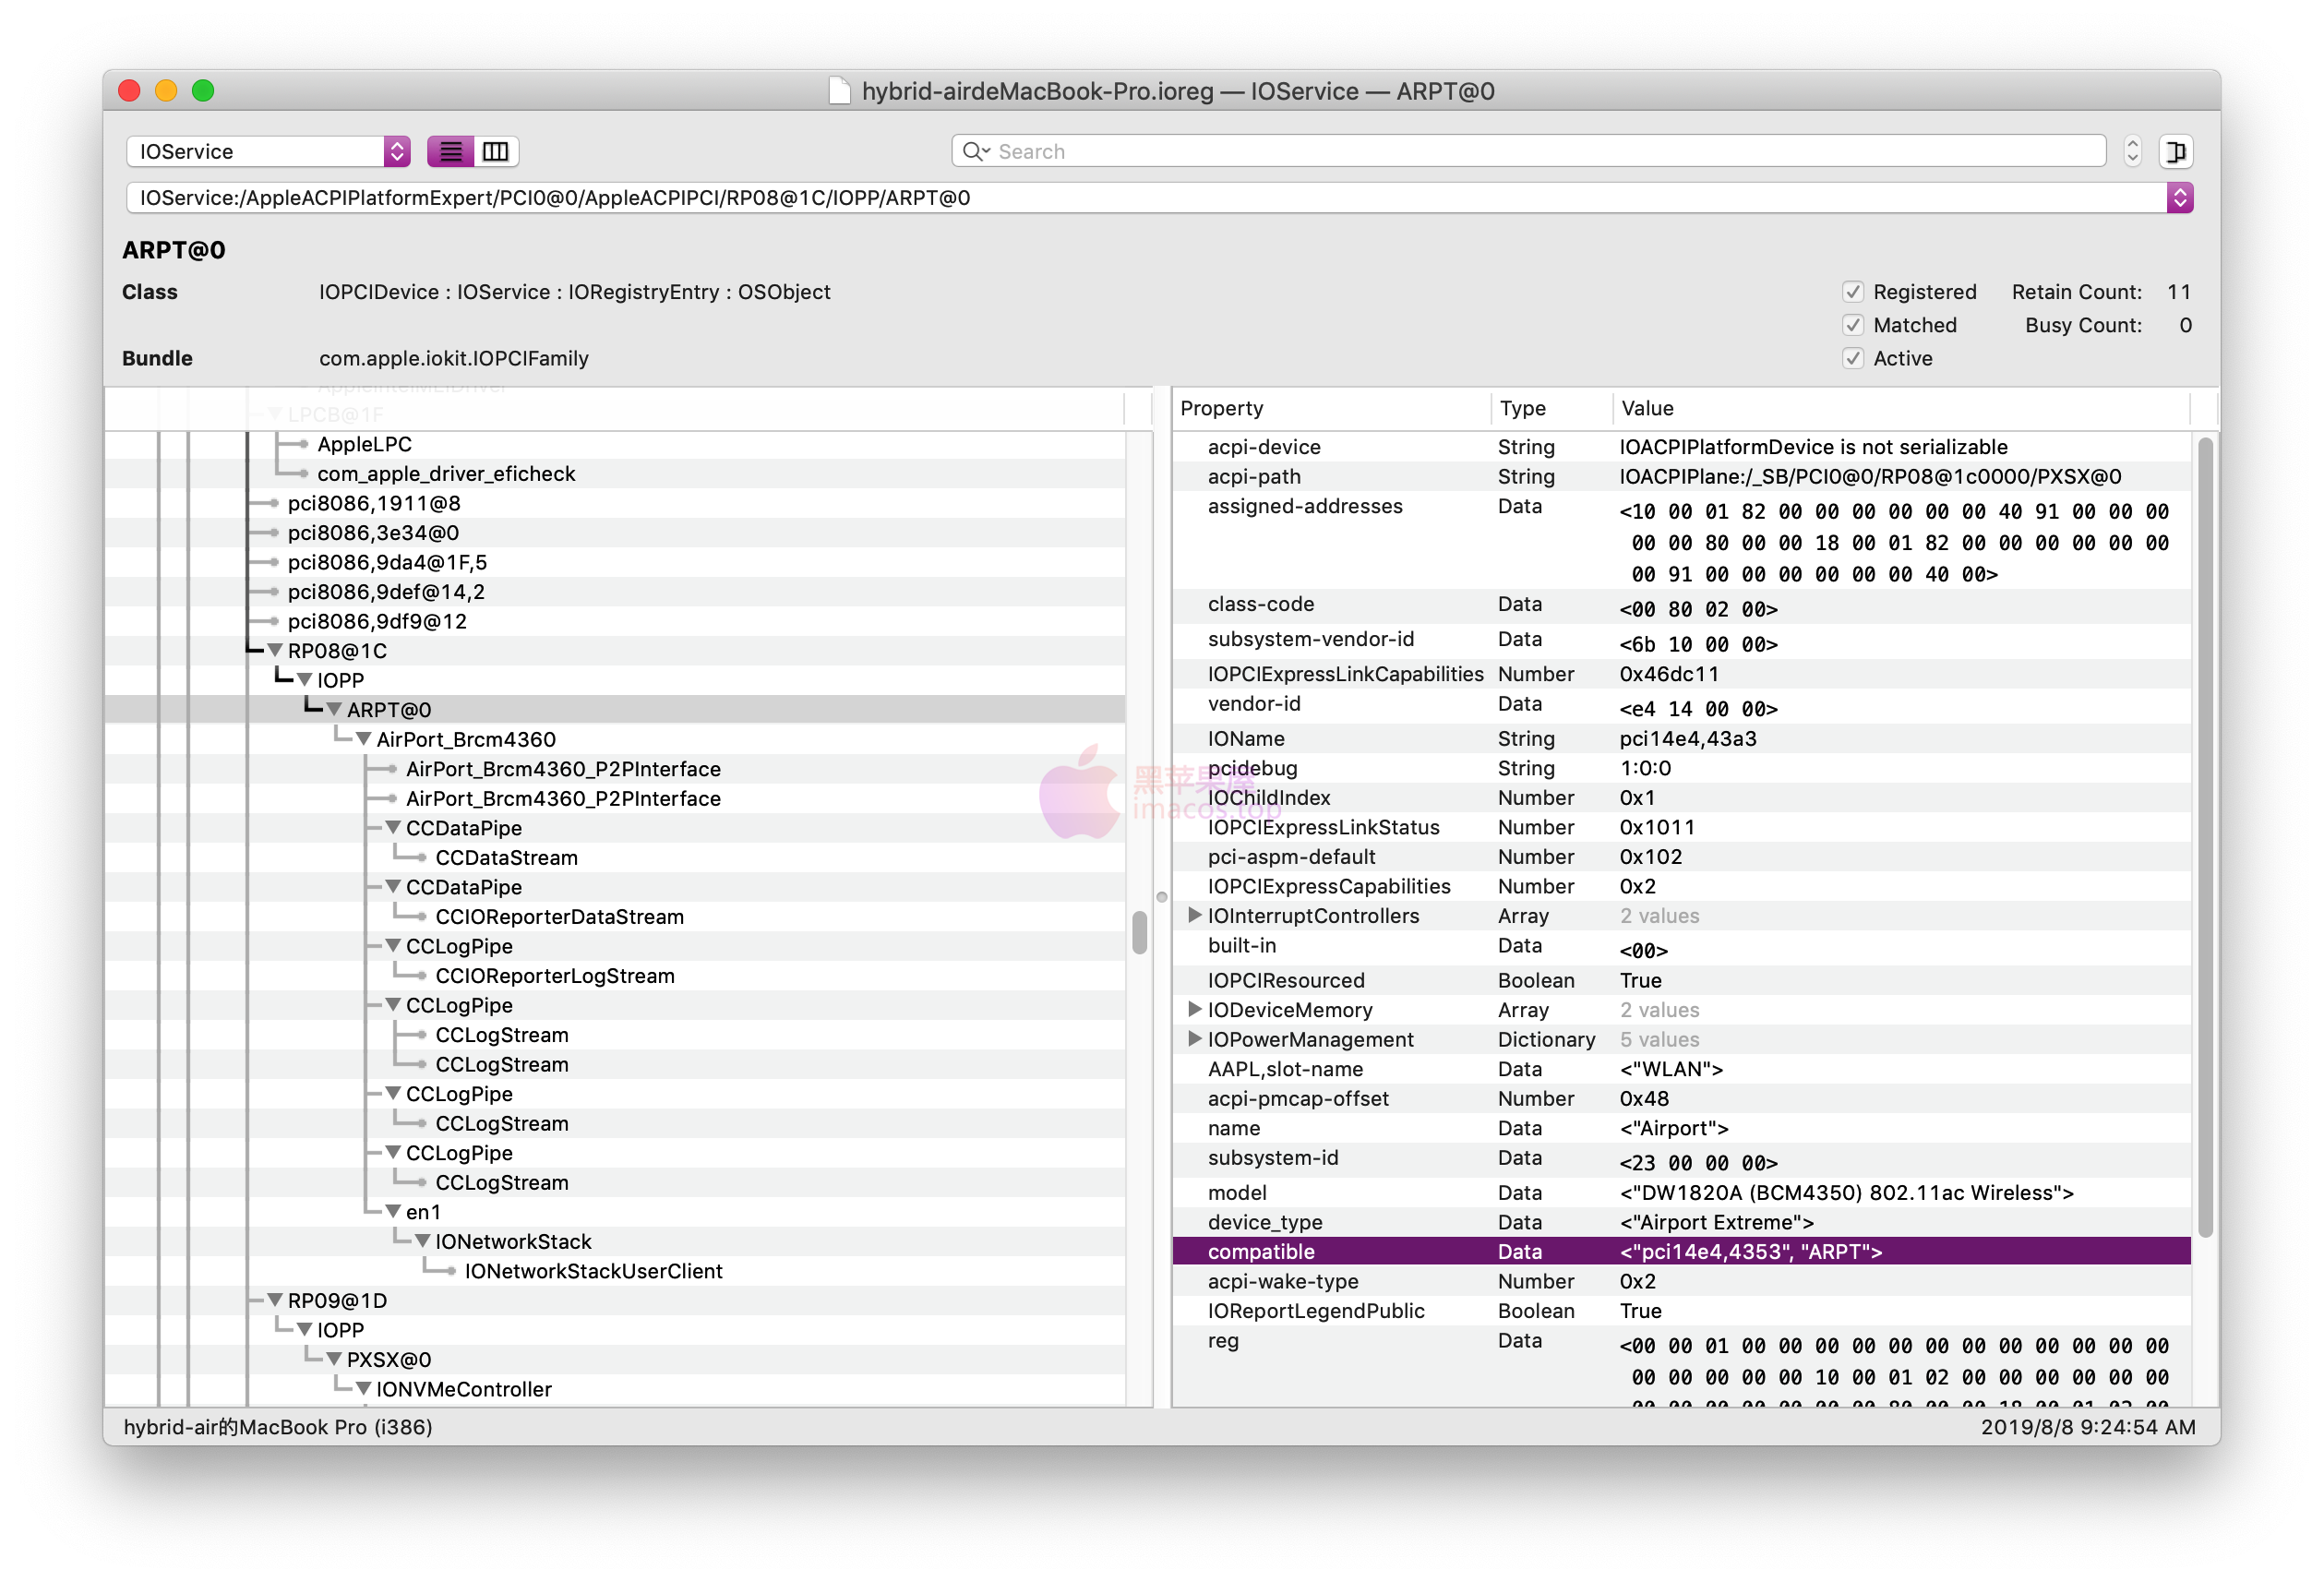
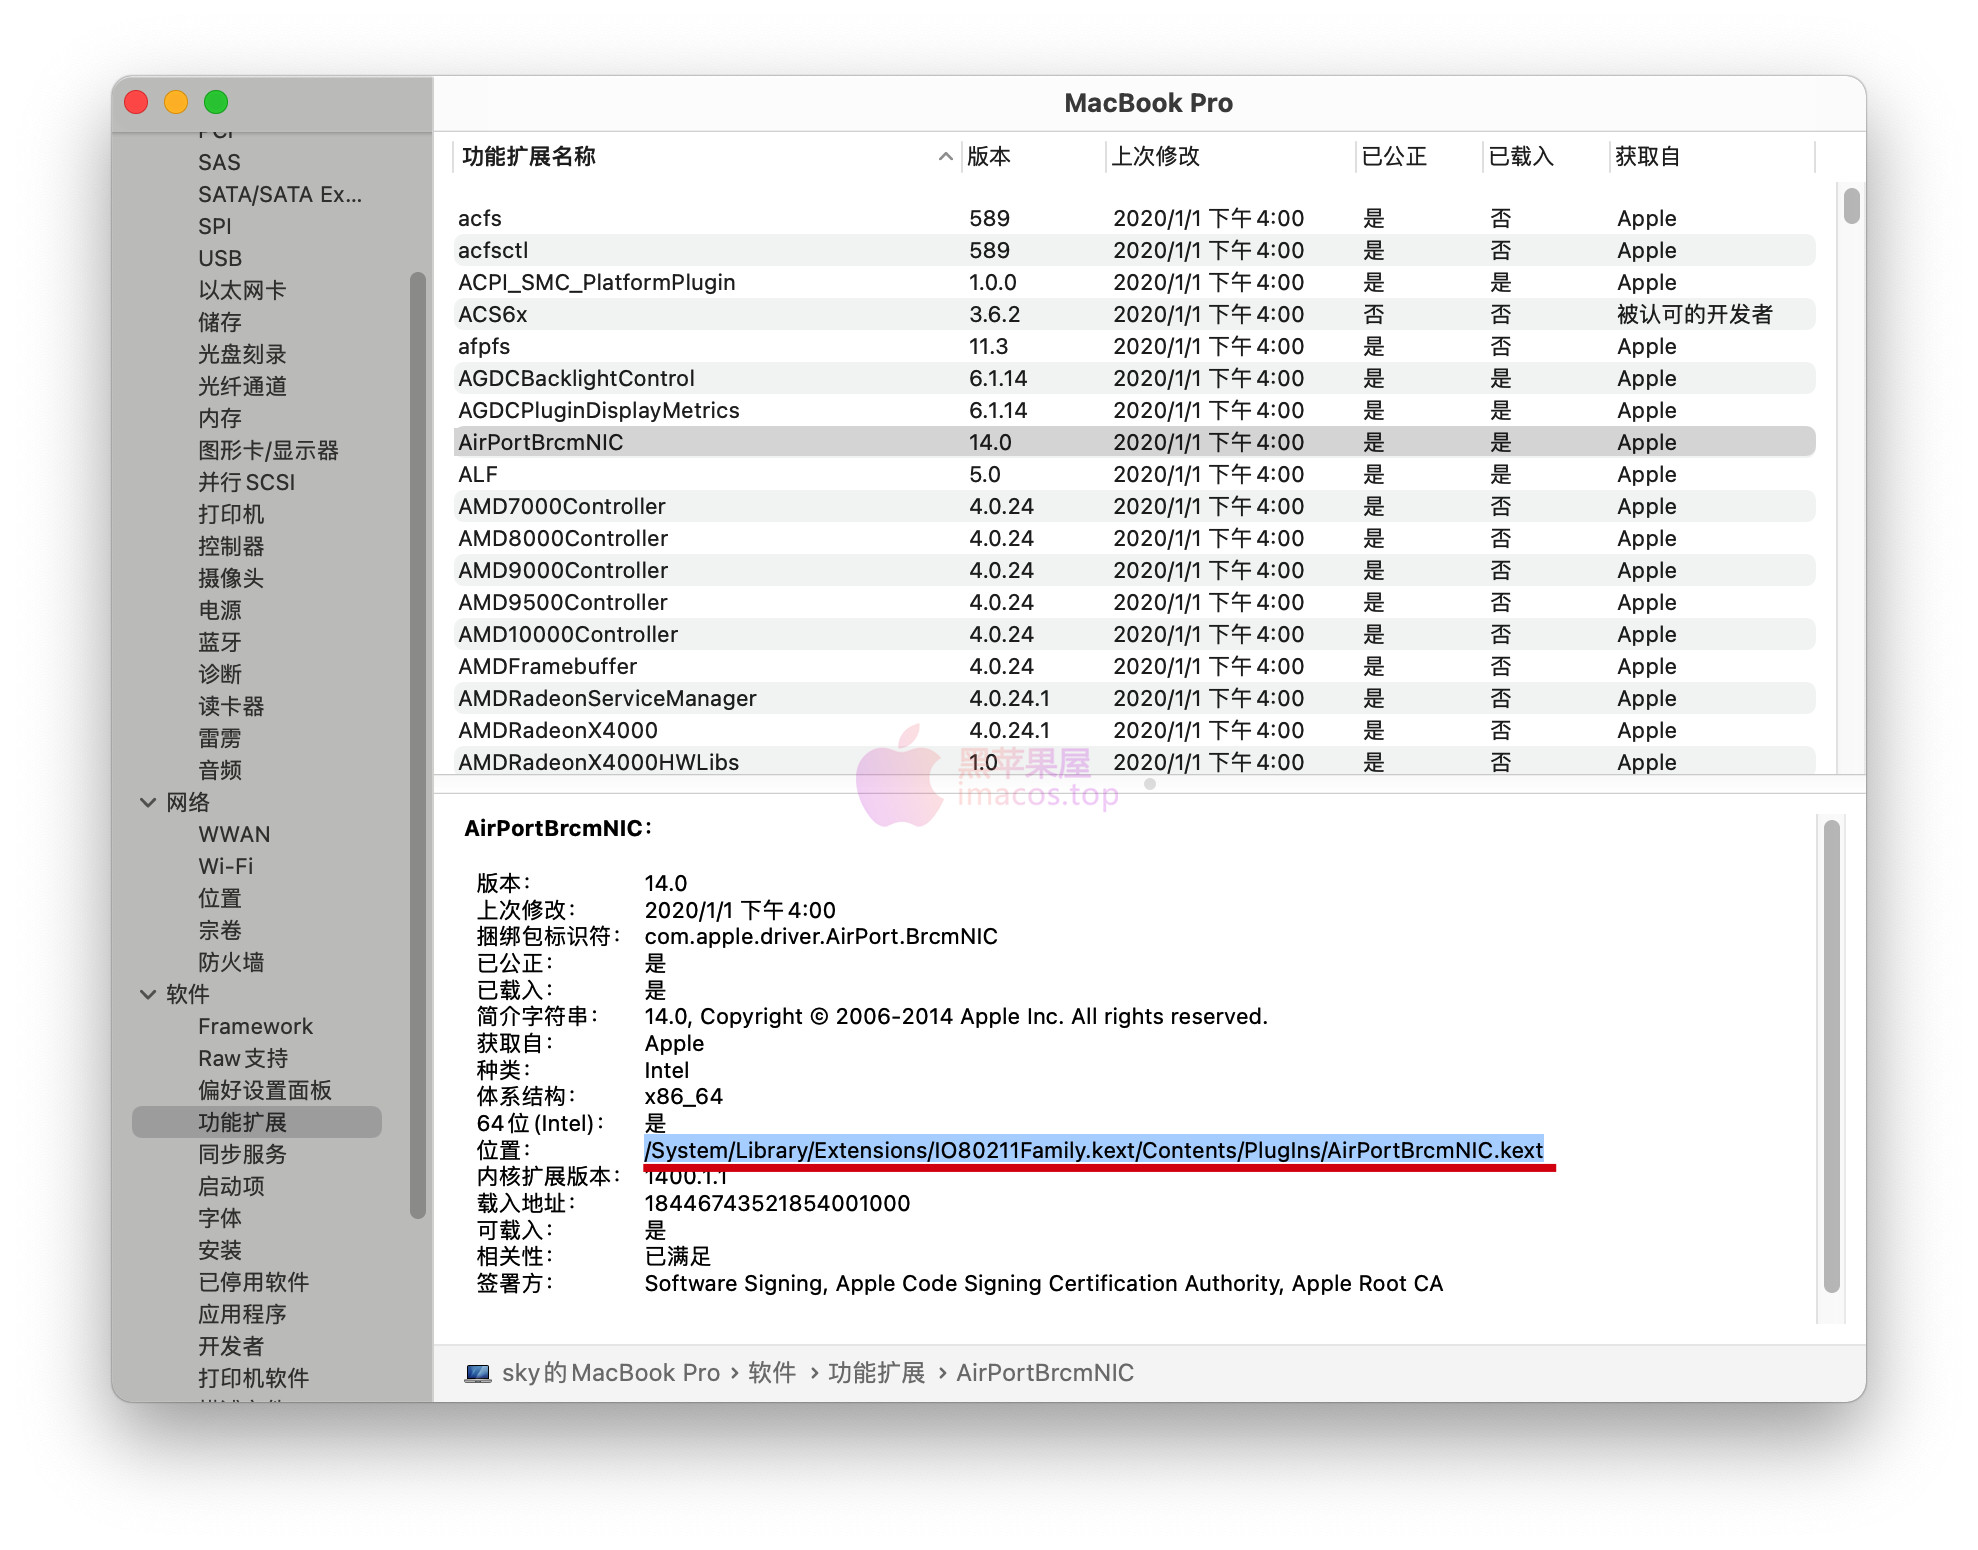
部分机型可能需要屏蔽针脚才能正常使用
注意事项:
- 安装系统之前,请于
BIOS中禁用WLAN/WIFI和Bluetooth,待安装系统成功后再行开启; - 如果插上网卡后进入系统直接卡住了,请于
/EFI/CLOVER/kexts/Other目录中添加驱动AirPortBrcmFixup下载 ,并于CLOVER引导主界面按字母o进入Options,在Boot Args:中添加引导参数:-brcmfxoff直接跳过网卡驱动的加载【不加载网卡驱动】进入macOS系统后,再完善驱动 - 如果WIFI的连接速率只能到300Mbps,或者国家代码是
US,请参考教程注入国家代码:brcmfx-country=#a即可。(请于/EFI/CLOVER/kexts/Other目录中添加驱动AirPortBrcmFixup) - 如果想体验随航(
Sidecar) /Apple Watch(测试性)解锁功能,请将pci14e4,4331修改为pci14e4,43a0或者pci14e4,4353,以便驱动AirPortDriverBrcmNIC并开启相应功能 - 如果找不到
WIFI设备,可以尝试将屏蔽针脚的胶带的前3剪下来,保留后2 如果蓝牙无法连接音频设备,或者连接后马上断开,请关机拔掉电源,等待5分钟再加电开机- 基本常识:双天线的网卡都存在蓝牙和WIFI的2.4G共用相同频率导致的信号干扰问题,解决方案:WIFI连接到5G使用即可。该现象常见于DW1560/DW1820/BCM94360CS等双天线网卡

评论0